

Today’s independent author is responsible not only for writing great books, but doing their own marketing as well. Increasingly, that includes creating the images and creative assets needed for marketing activities. Images are required for social media posts, graphics are needed for web ads and banner swaps, and every book cover is an image. Back in the old days, you either had to learn Photoshop, know someone who did, or pay someone to create these images and assets for you.
Fortunately, that is no longer the case! Now we have cool book marketing tools like Canva.
Authors, think of Canva as an online, easier-to-learn version of Photoshop.
This article will show you how to use Canva to create your own book marketing images. We will use step-by-step instructions and short videos of the actual Canva interface to teach you how to create the images you need to promote your books. Canva can be used to create all kinds of images, but we’ll focus on 3 main use cases to keep it simple:
- Social Media Images
- Banners / Ads
- Book Covers
Sign Up for Canva
If you have a Canva account, skip to the next part.
Head over to Canva.com and sign up with a Google or Facebook account, or by setting up an email address and password.
Once you have signed up, Canva will try to walk you through the interface. Go ahead and click through, skip, or play with Canva to bypass this.
On to the next section!
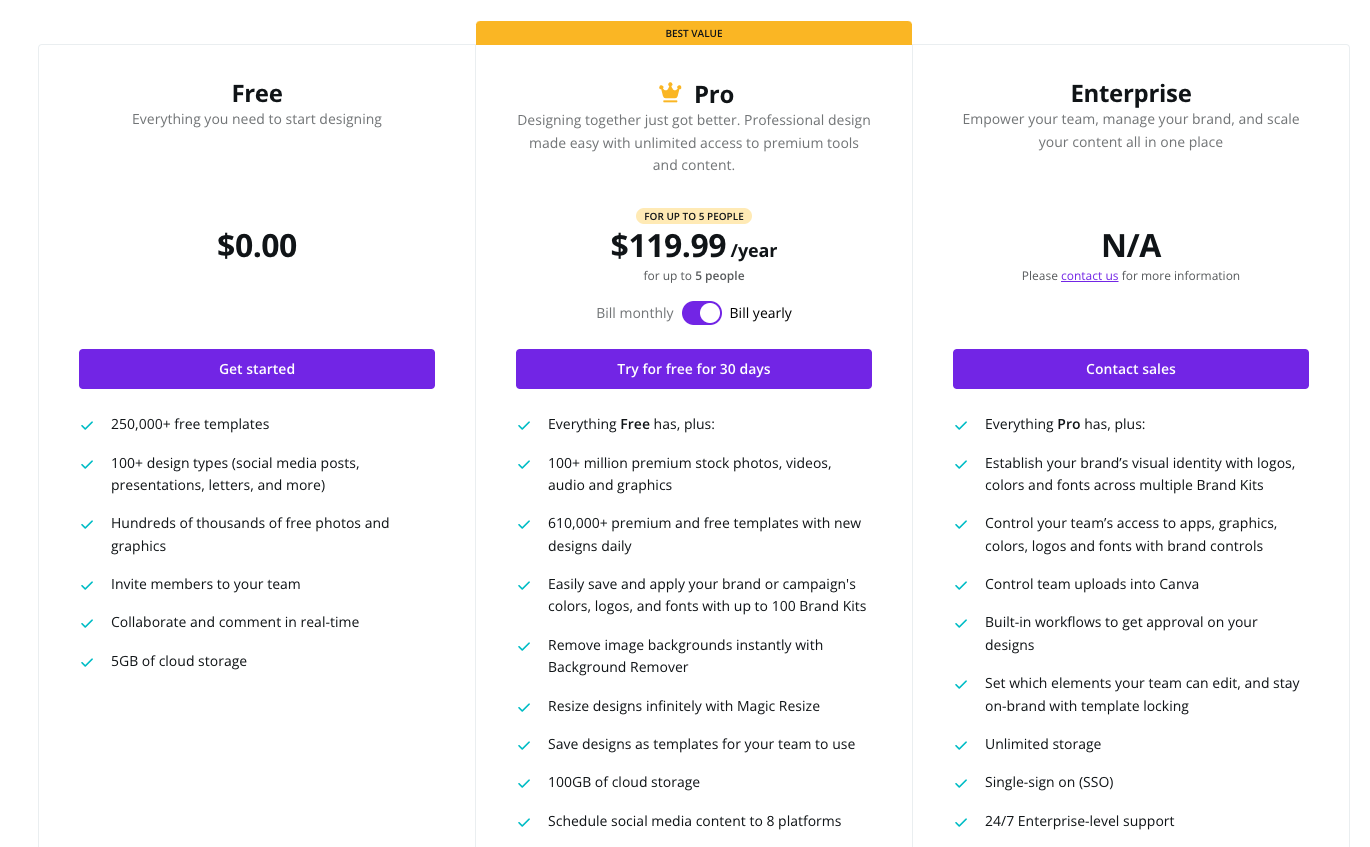
Canva Pricing Plans
While Canva does have a generous free pricing plan, you should note that it is limited to 5GB of cloud storage. This should do the trick for most authors, but if you’re hoping to expand your plan to include premium stock photos, additional cloud storage, and deeper customer support, you’ll need to look into different pricing models:
Using Canva to Create Social Media Images
Social media is a great way to keep up with your readers and fellow authors. Creating images is a vital part of keeping your social media accounts active and making your profiles look professional.
For social media, you typically need to create:
- Cover images,
- Profile pictures,
- Promotional images, and
- Engagement images.
Canva can help you create all different kinds of imagery for your social accounts. For this tutorial, we’ll show you how to make an image for an engagement post.
Engagement posts are quick posts to keep your followers engaged and active.
It’s important to keep your audience engaged so they’re at the ready when you launch a new book and need them to spread the word and drive sales of your novel. Coming up with new engagement images can be a struggle. Canva is here to help! We’ll start by creating a basic engagement post.
The image we’re going to create is based on sizing dimensions for an Instagram post (1080 x 1080 px). If you need to resize for Facebook or Twitter dimensions you can do so once the image has been created.
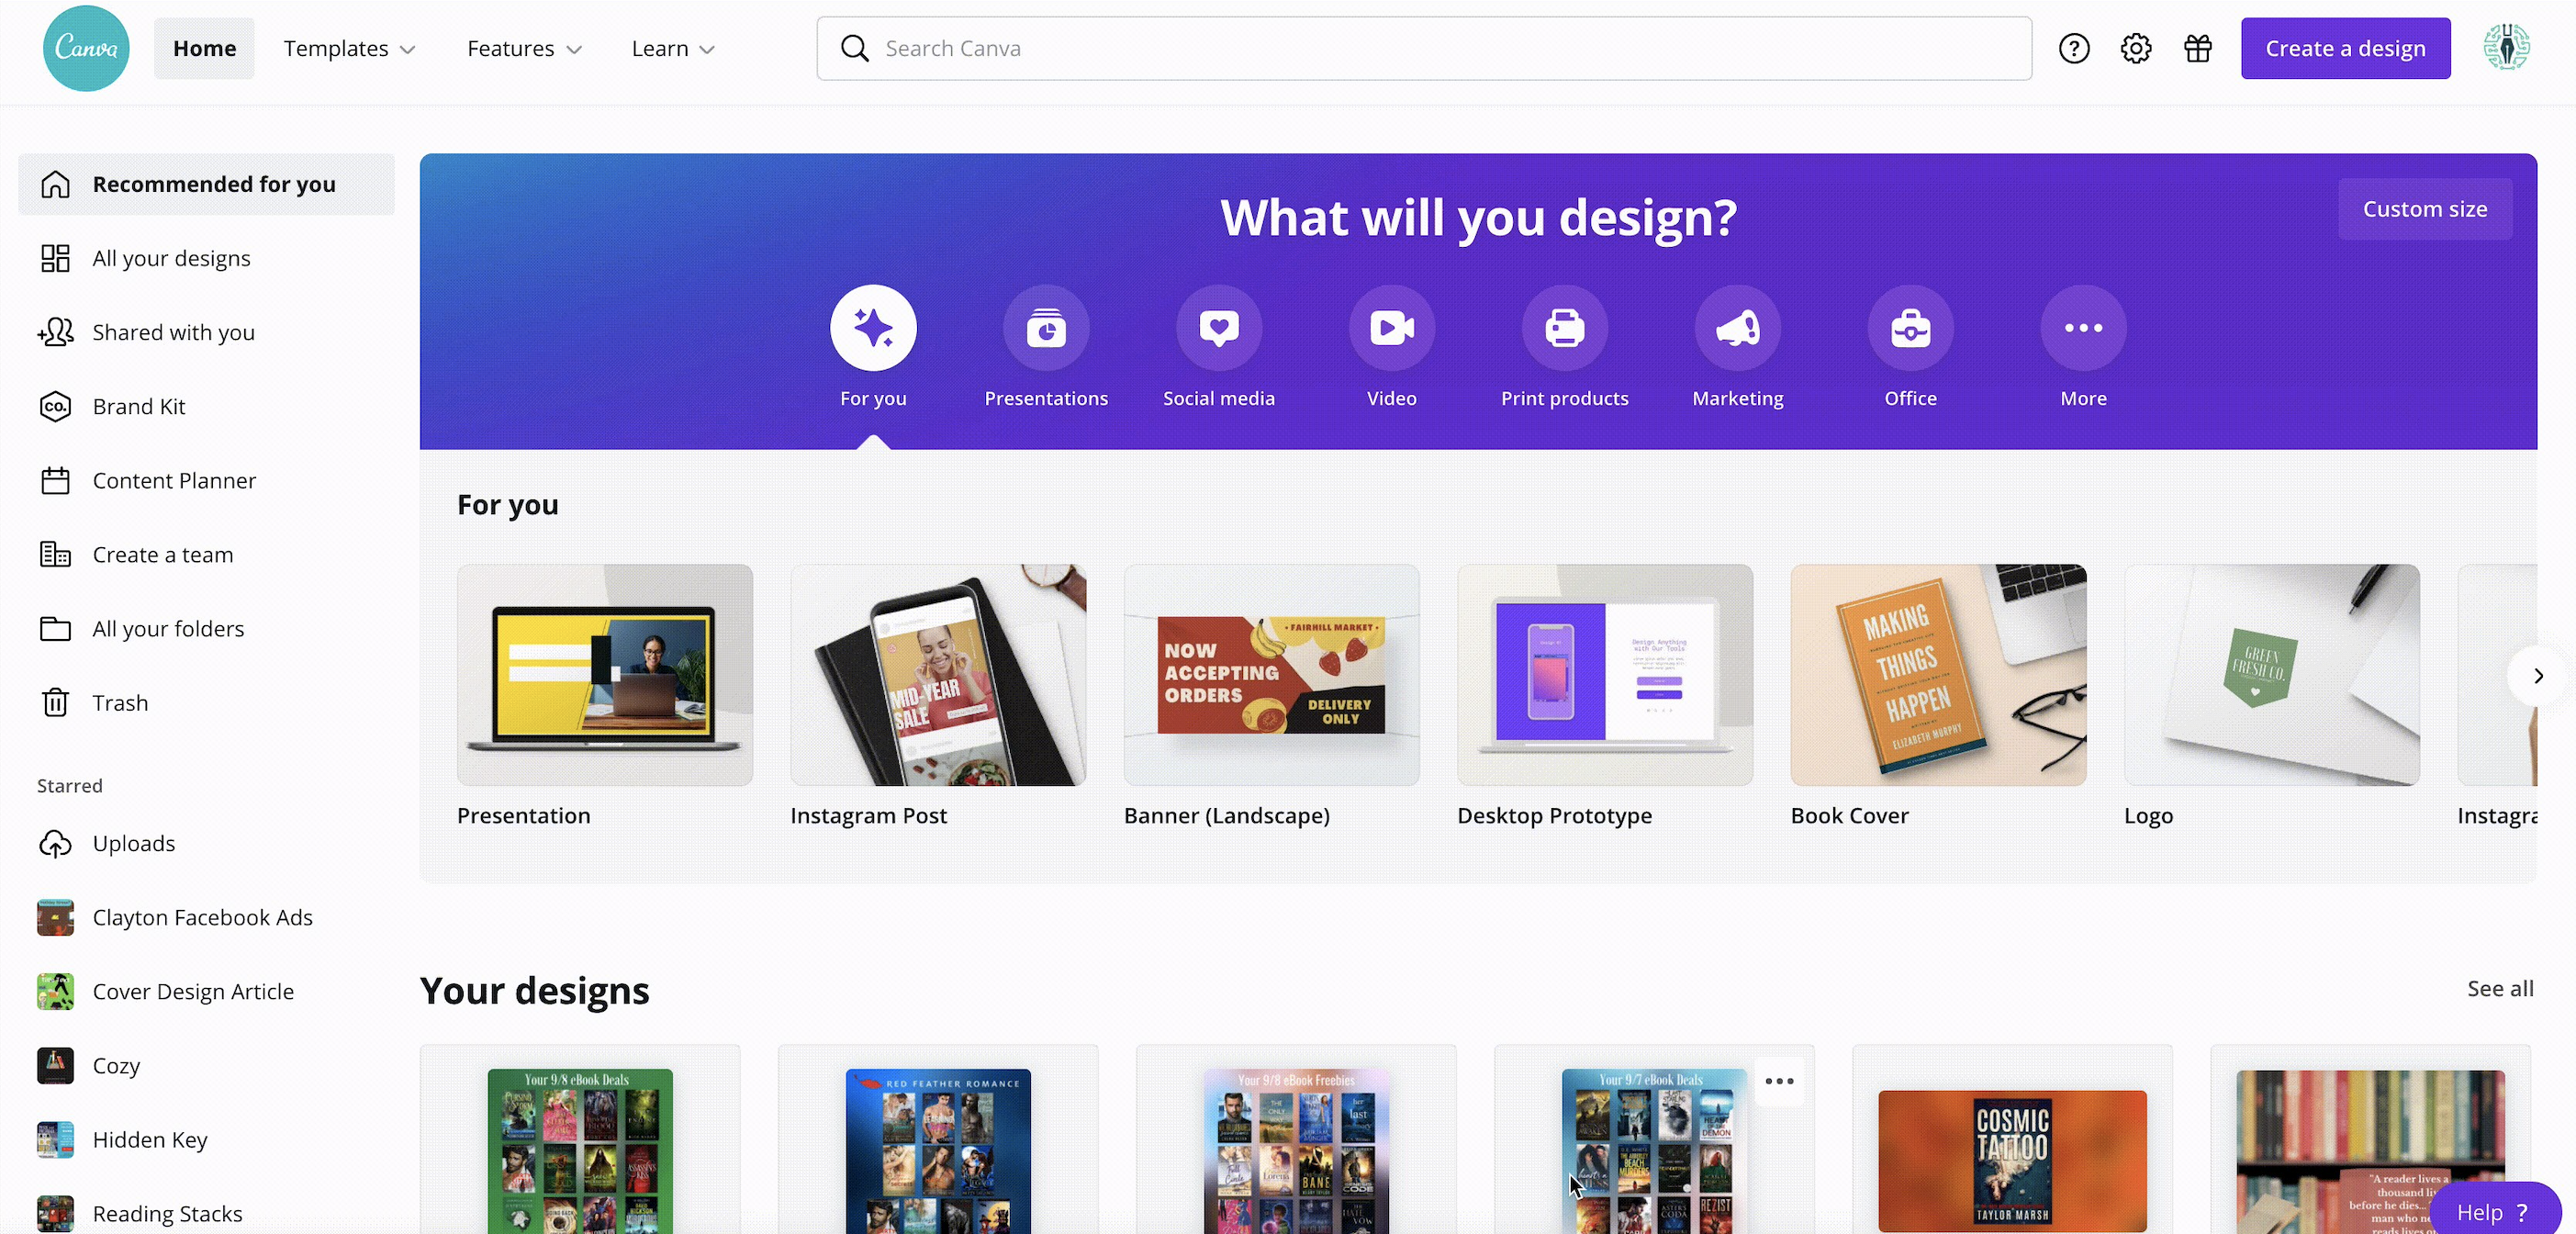
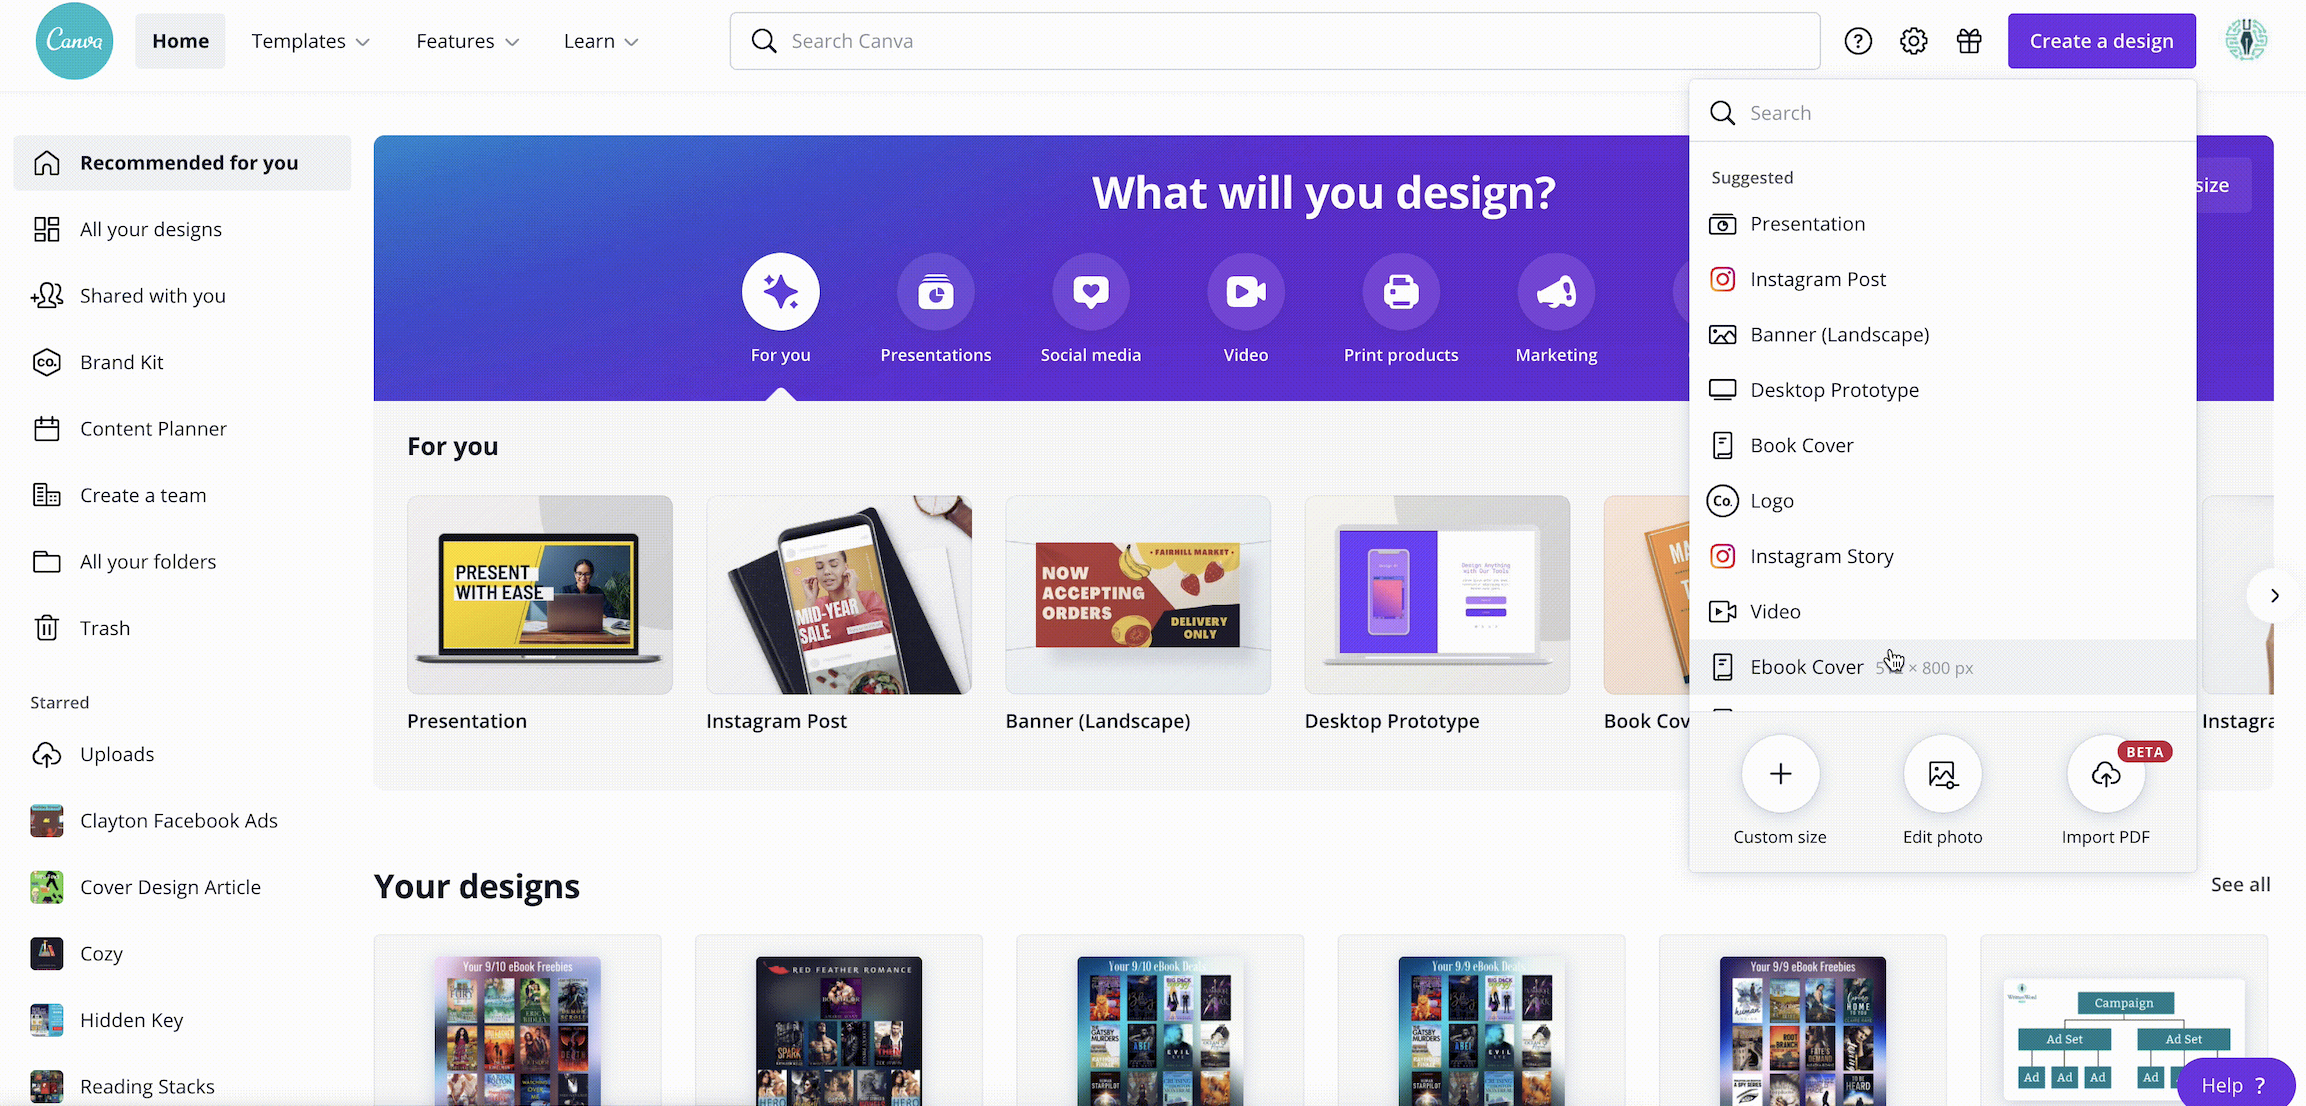
- Open Canva.
- Click the purple button in the upper right hand corner that says Create a Design.
- Choose the template called Instagram Post. This will open up the editing view for your image.
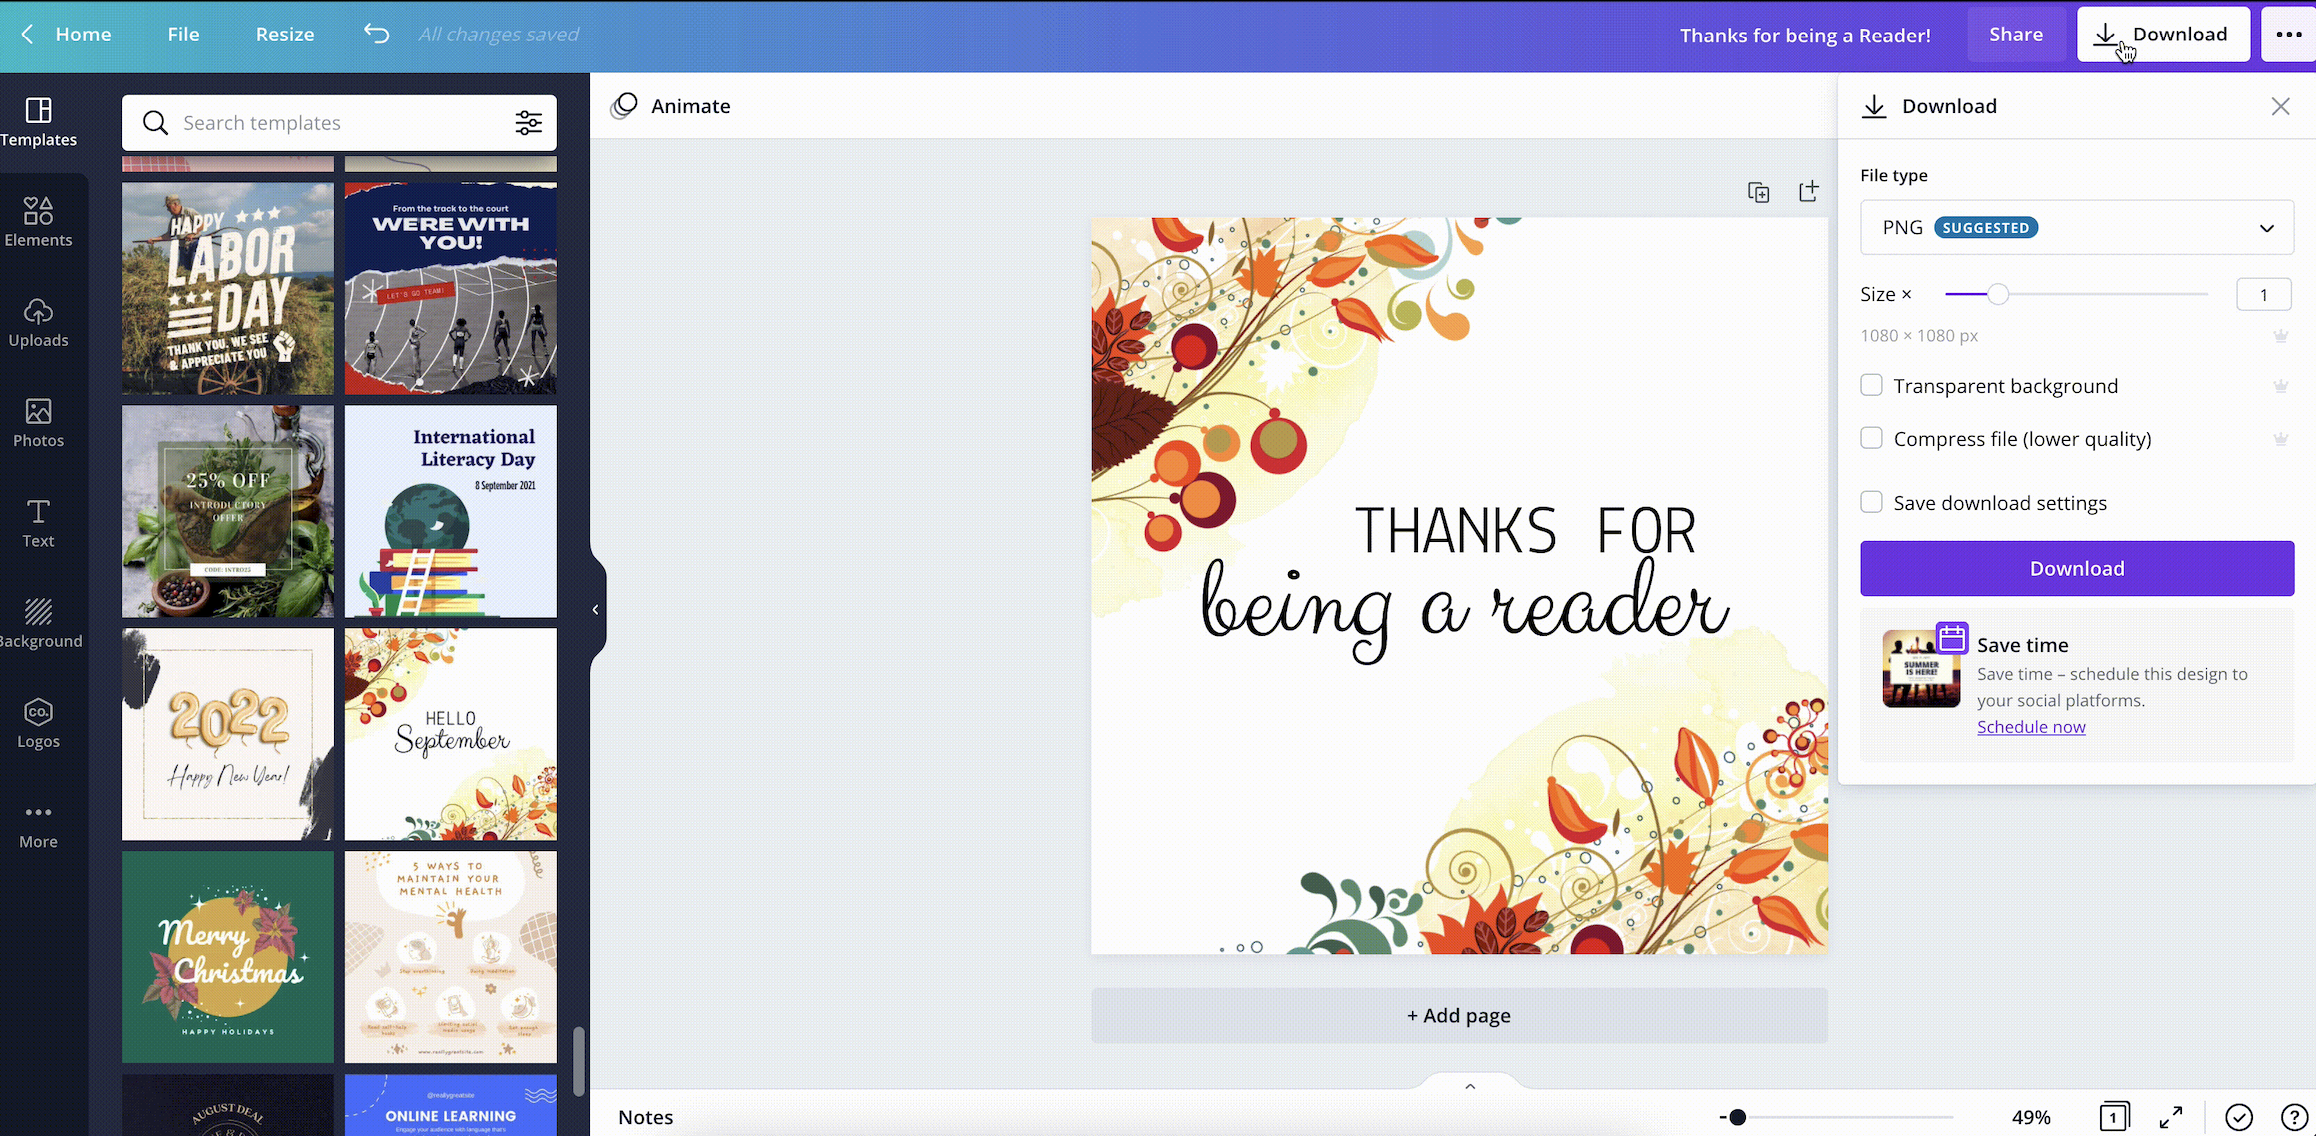
One of Canva’s biggest selling points is that there are templates already set up for you to use. You can find these on the left hand side of the page under Templates. Once you select a Template, it will appear in the main work area. Then you can customize the text by clicking on it and overwriting the template text with something your readers will appreciate. In the example below, we’re creating an image that thanks our readers.
- From your open Instagram design, click Templates from the left hand menu.
- To select a layout click on the thumbnail of that layout (scroll down to view more options).
- Edit the text by clicking directly on the text. Change it to say what you want to your readers. In our example, the text says “Thanks for being a reader”
- Click the Download button in the upper right hand corner of your screen to save the image to your desktop.
That’s it, you’re done! Easy, right? You can use the same basic steps to create all kinds of social media imagery for all social media platforms.
As we mentioned earlier, it’s important to know the exact sizing dimensions you need for a social media post. All platforms vary, including the type of image you’re posting. For example, a Facebook cover photo has different dimensions than a profile picture.
The next step is getting the image out of Canva and onto social media. Canva offers the ability to schedule your posts to social media sites. We’ll cover all the exporting options at the end of the article.
Using Canva to Create an Ad / Promo Image
Sometimes you’re directly marketing your book to a new audience with the goal of selling it. These opportunities come in a variety of forms. Maybe you’re doing a newsletter swap with another author. Maybe you’re paying to run an ad on a blog. Or, better yet, maybe you’re running Facebook Ads! In all of these cases, Canva can help you create the appropriate ad images.
For this example, we’ll show you how to create a Facebook Ad to promote a book. You can use the same basic principles to create any banner ad or promo image.
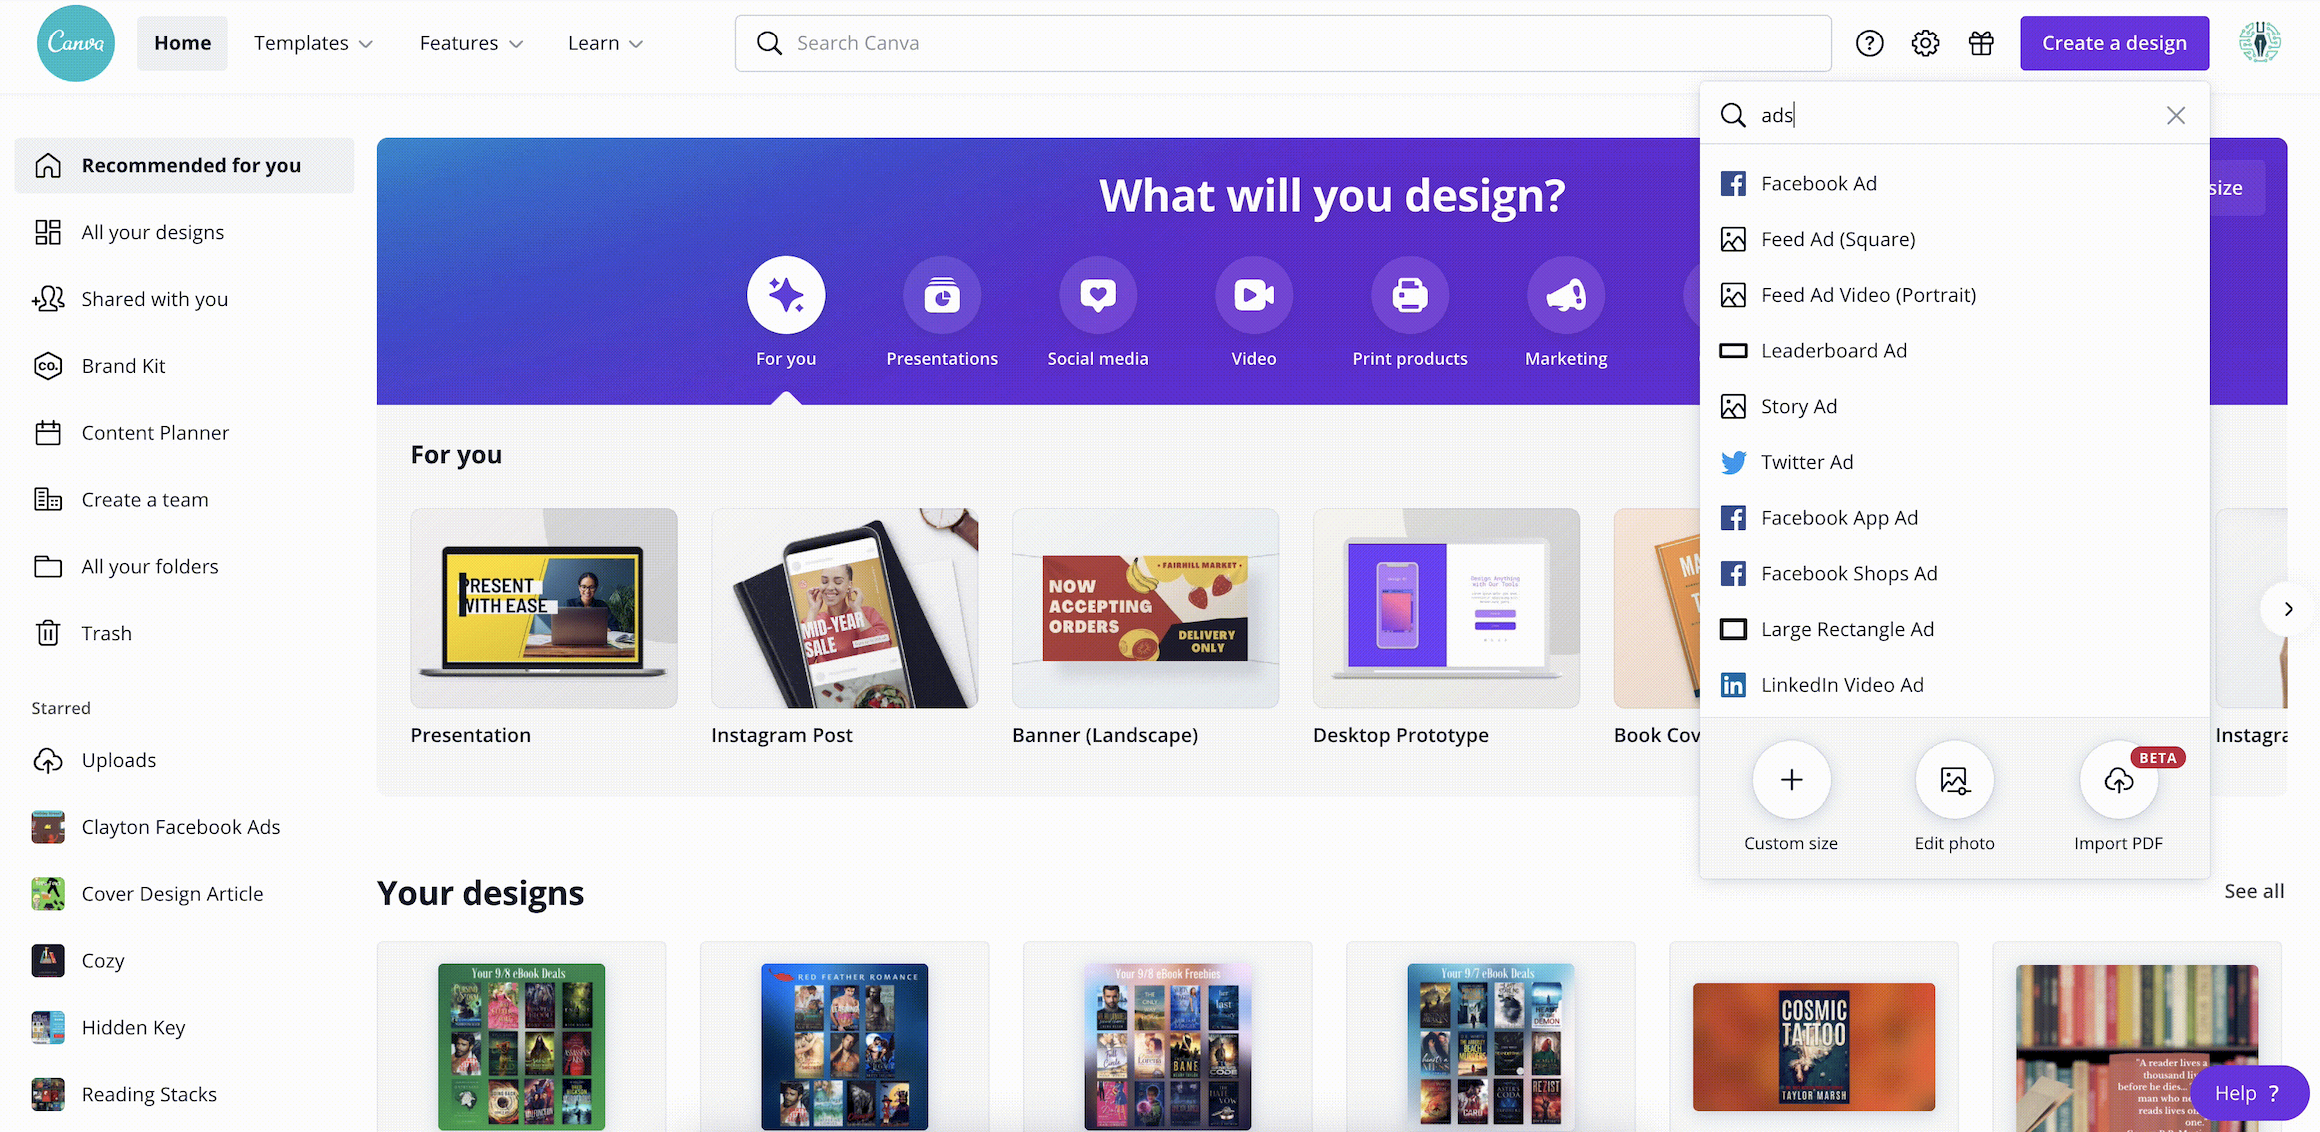
- Open Canva.
- Click the purple button in the upper right hand corner that says Create a Design.
- In the search box, type in Ads. From there, choose the template called Facebook Ad. This will open up the editing view for your image.
Now we’re in the editing screen and we’re ready to make our ad. This is a little trickier than engagement imagery because, with this ad, you want to promote a specific book. We will need to import images and move them around.
- From your open Facebook Ad design, click Templates from the left hand menu.
- To select a layout click on the thumbnail of that layout (scroll down to view more options).
- Click Uploads from the left hand menu.
- Click the purple button that says Upload media.
- Locate your book cover on your computer and upload it (in a pinch you can right-click, and download the book cover from Amazon to your desktop).
- The book cover image should now be in your upload library.
- Click the book cover from your upload library to add it to your design.
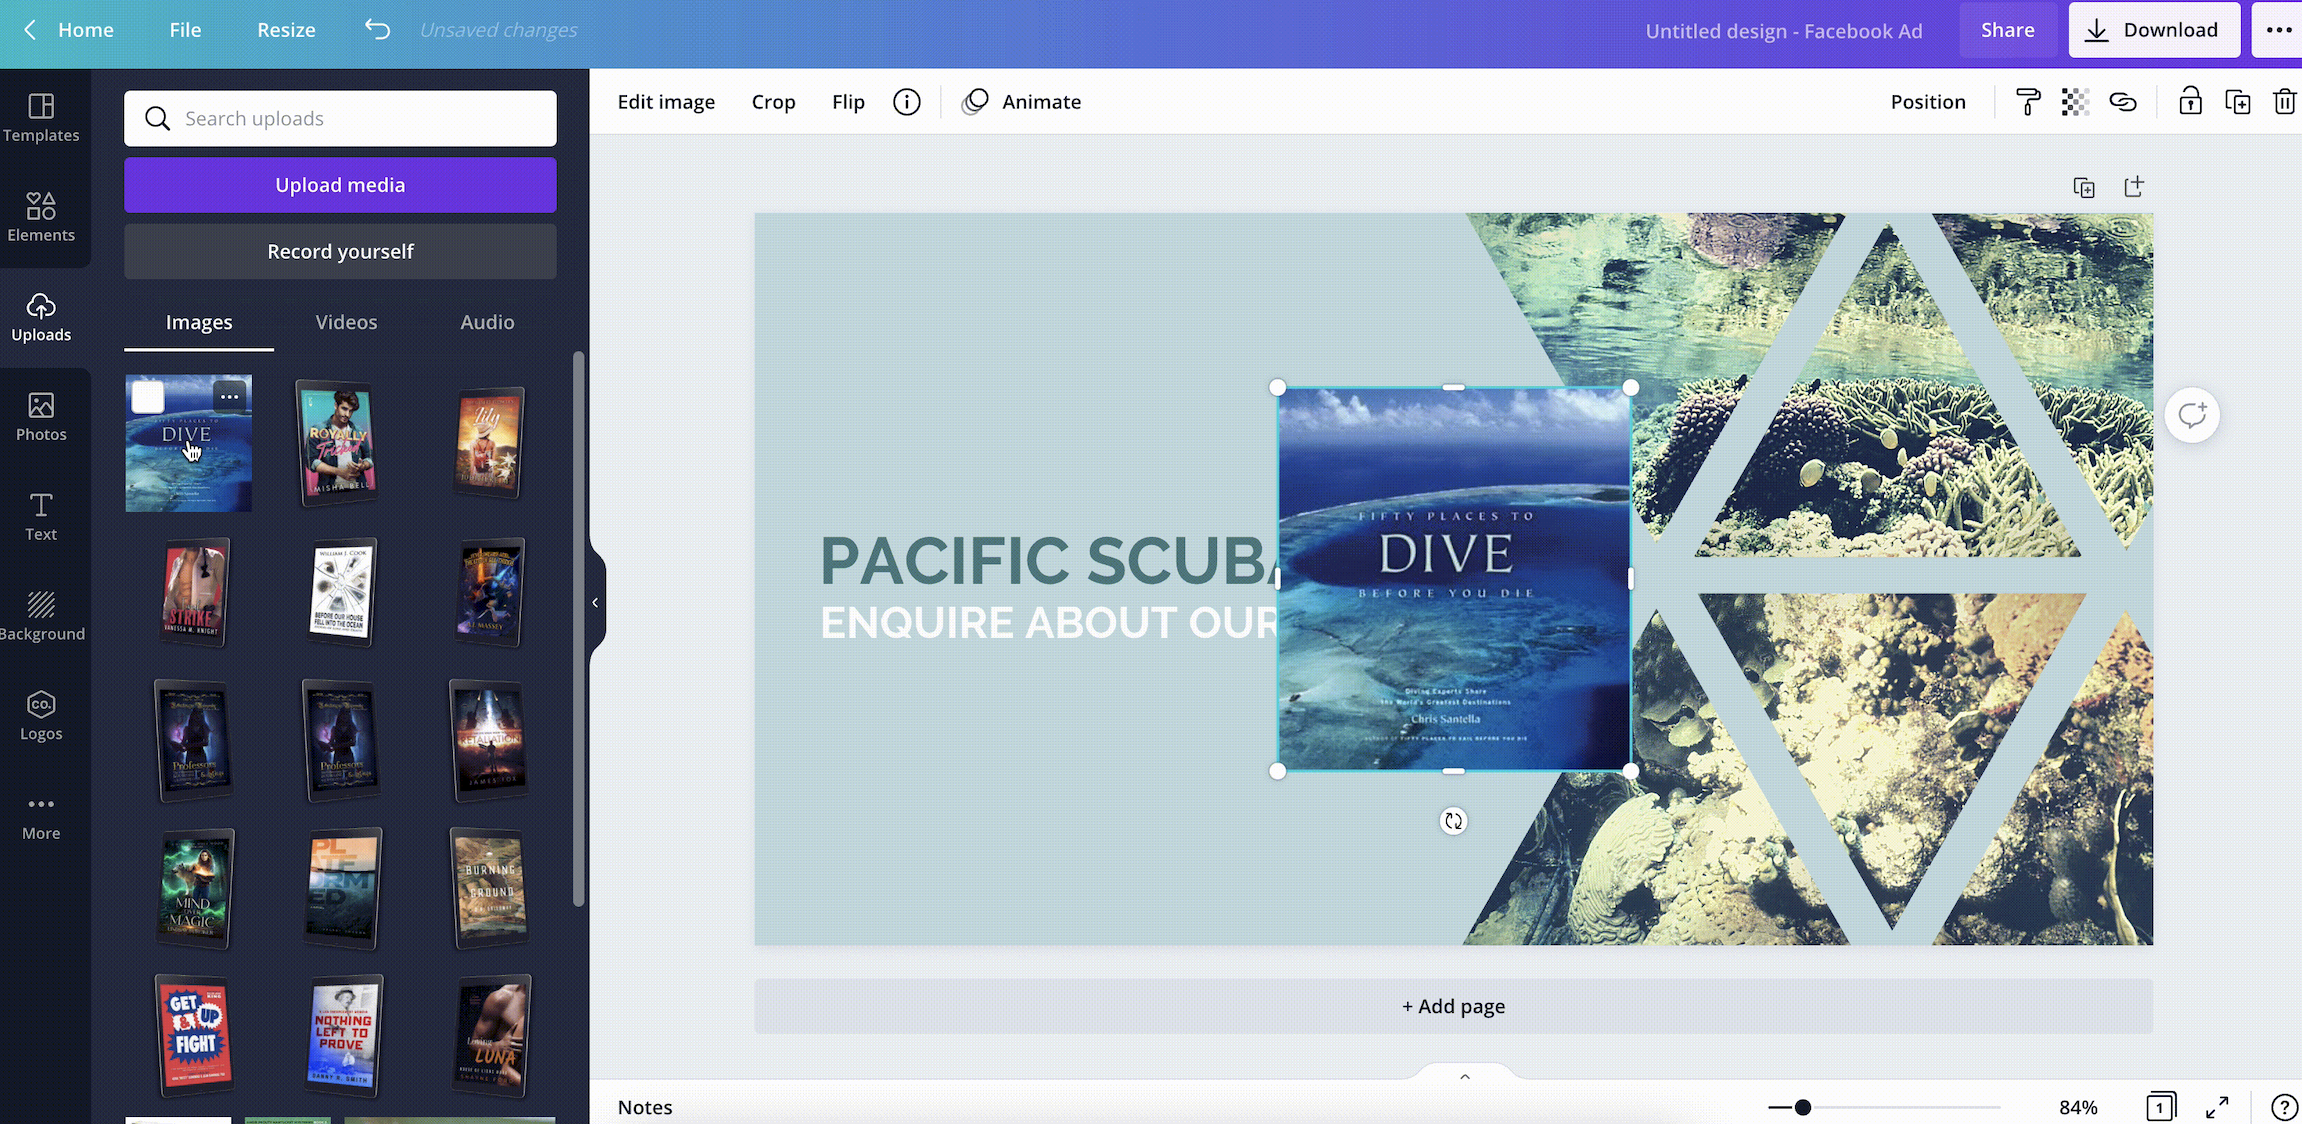
Now we have our Layout built and our book cover image added to the project. Let’s edit the ad until it looks the way we want it to.
- Click on the background image of your design to select it.
- Change the background color to whatever looks complementary to your book.
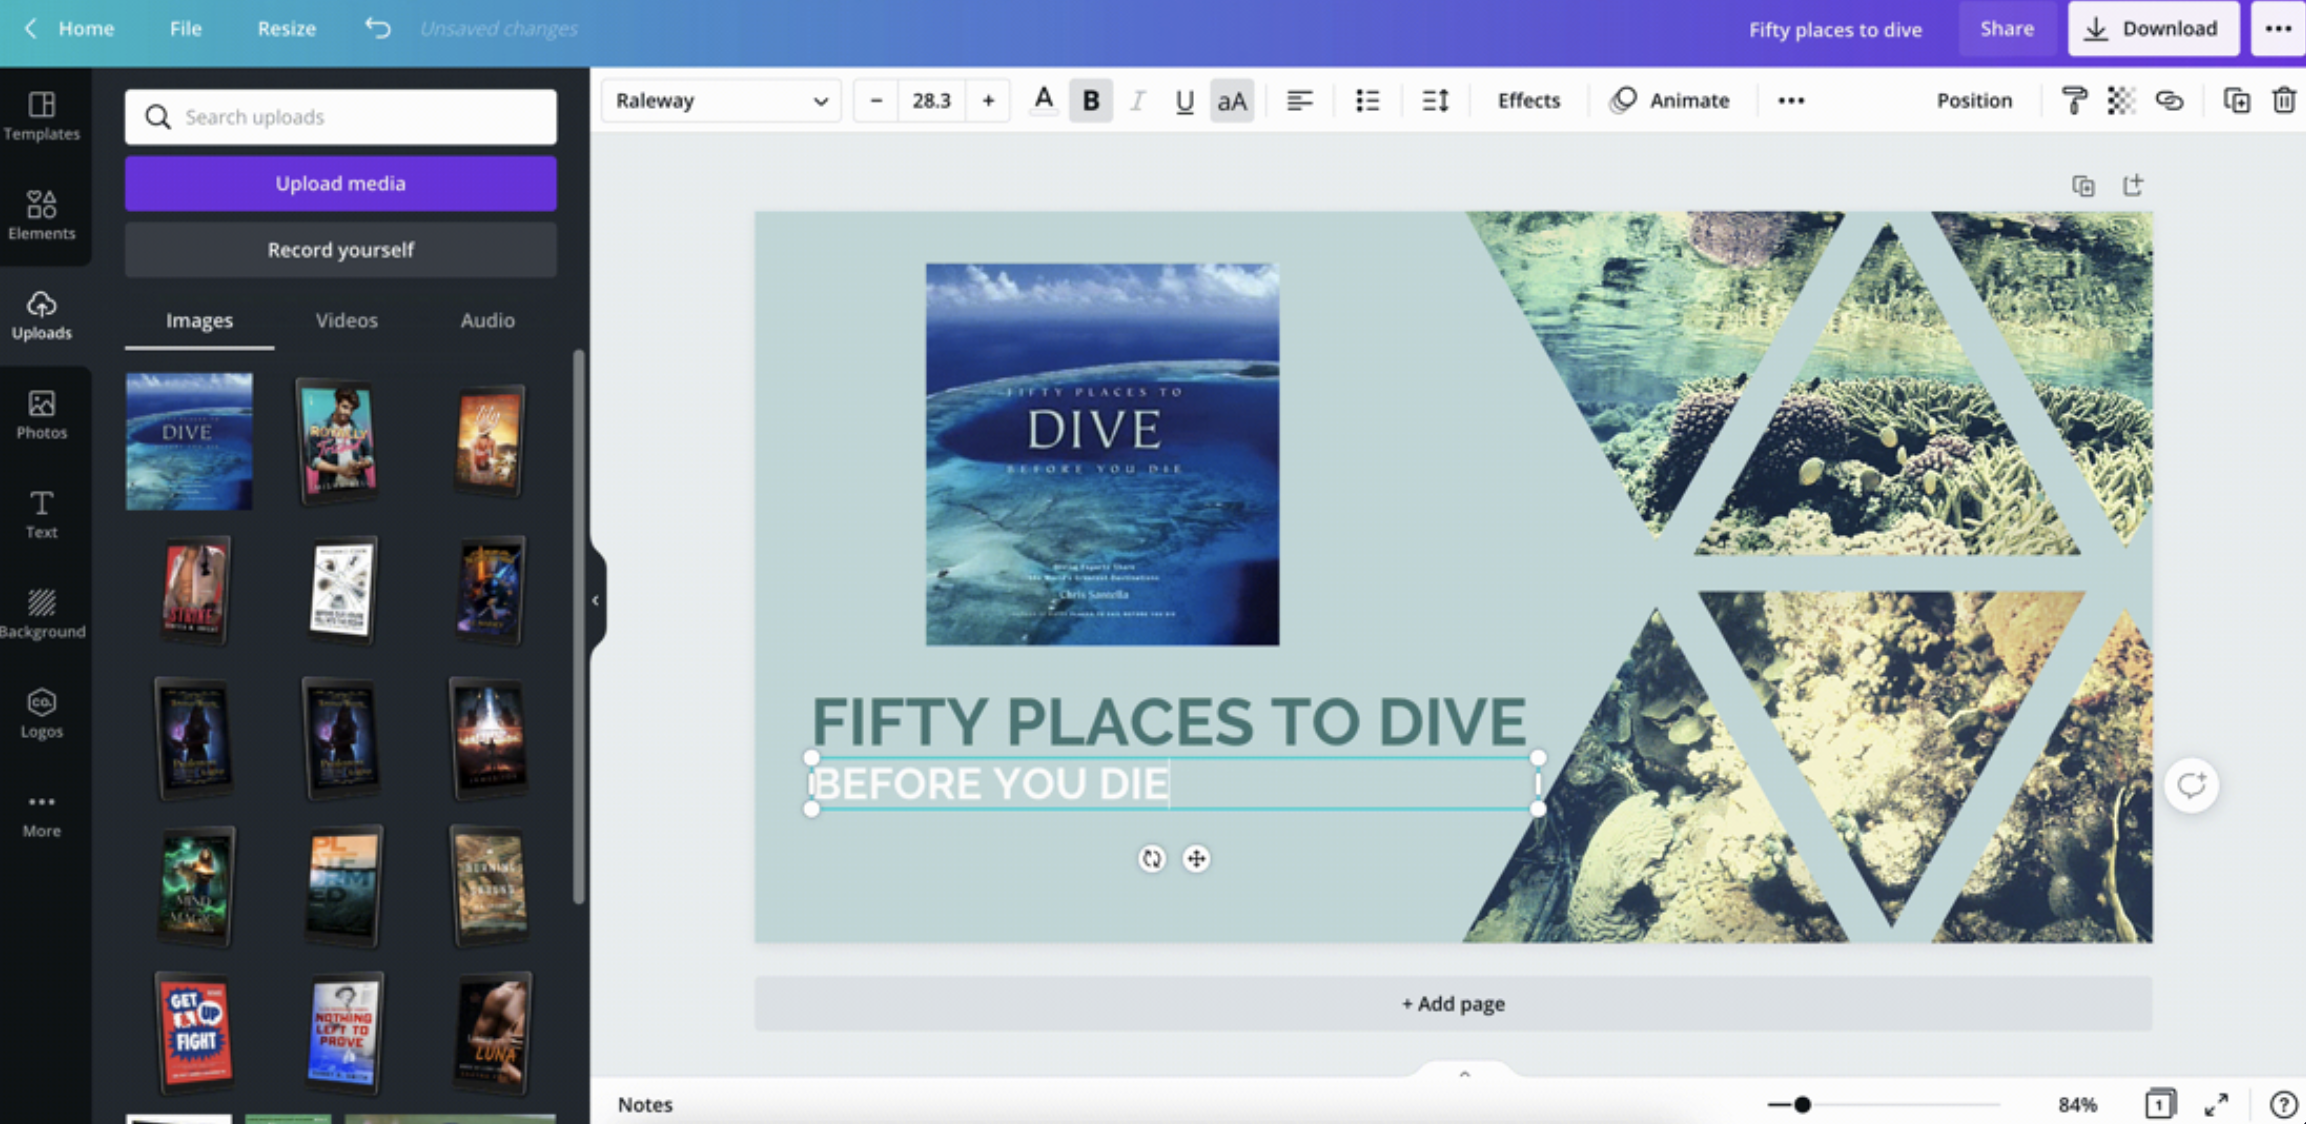
- Move the book cover image so it’s in a good place. Arrange your text where it should go.
- Looking good so far! Almost done!
- Click on the text to edit it and change the default text to your book title.
- You can replace any extra text with a one-line summary of your book.
- All done!
Feel free to get even snazzier from here! The beauty of Canva is that it has a wide variety of fonts and elements to choose from, even on the free plan.
A quick note on the text: Making the ad look great is more important than making the ad accurate! In our example, we have the text “Fifty Places to Dive Before You Die”. This does not do the book justice at all, but looks good, so we go with it.
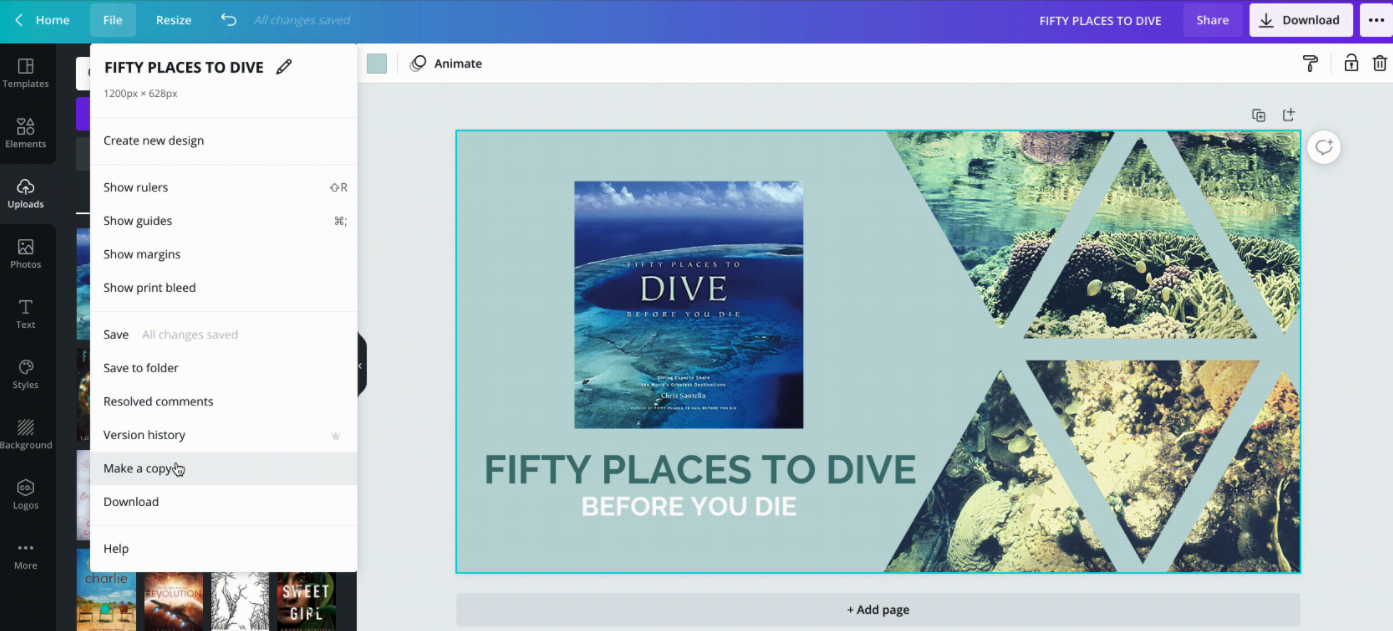
If you want to experiment with different fonts or colors simply duplicate the ad in the same Canva Project.
- Make sure you are still in your open Canva Project.
- Select File from the upper left hand corner of the Project, then click Make a Copy.
- Change the font or color of text to experiment, or play around with a new template.
- Repeat!
Using Canva to Create Your Book Cover
In our experience, it’s always best to hire a professional to get your cover designed. However, if you’re going to do it yourself, Canva is a great resource to use. We’ll walk you through the steps to start your design.
- Open Canva.
- Click the purple button in the upper right hand corner that says Create a Design.
- In the search box, find the Ebook Cover design option.
A Quick Note on Book Cover design
A good book cover tells the reader a little bit about the book and entices them to read it. The goal is to create a visually engaging image that is a nod to the plot contained in the book itself. Book covers that try to summarize the plot by adding all the elements of the story to the cover generally fall very short of this goal.
Let’s say your book is a Fantasy book that has a female vampire, a castle, sword-fighting, a few chapters on a sea voyage, and a love interest. Not all those elements need to be on the cover. In fact, the best covers pick just one or two elements of the plot to feature on the cover.
It’s more important for a book cover to be visually appealing than an accurate summary of the plot.
With that out of the way, let’s design a book cover!
- Make sure you’re in your open Canva Design for an eBook from the previous step.
- Select a layout from the list of thumbnails at the left, but don’t worry if the picture isn’t accurate. It’s okay to pick a template that’s off-topic from the content of your book; we’ll swap the images later.
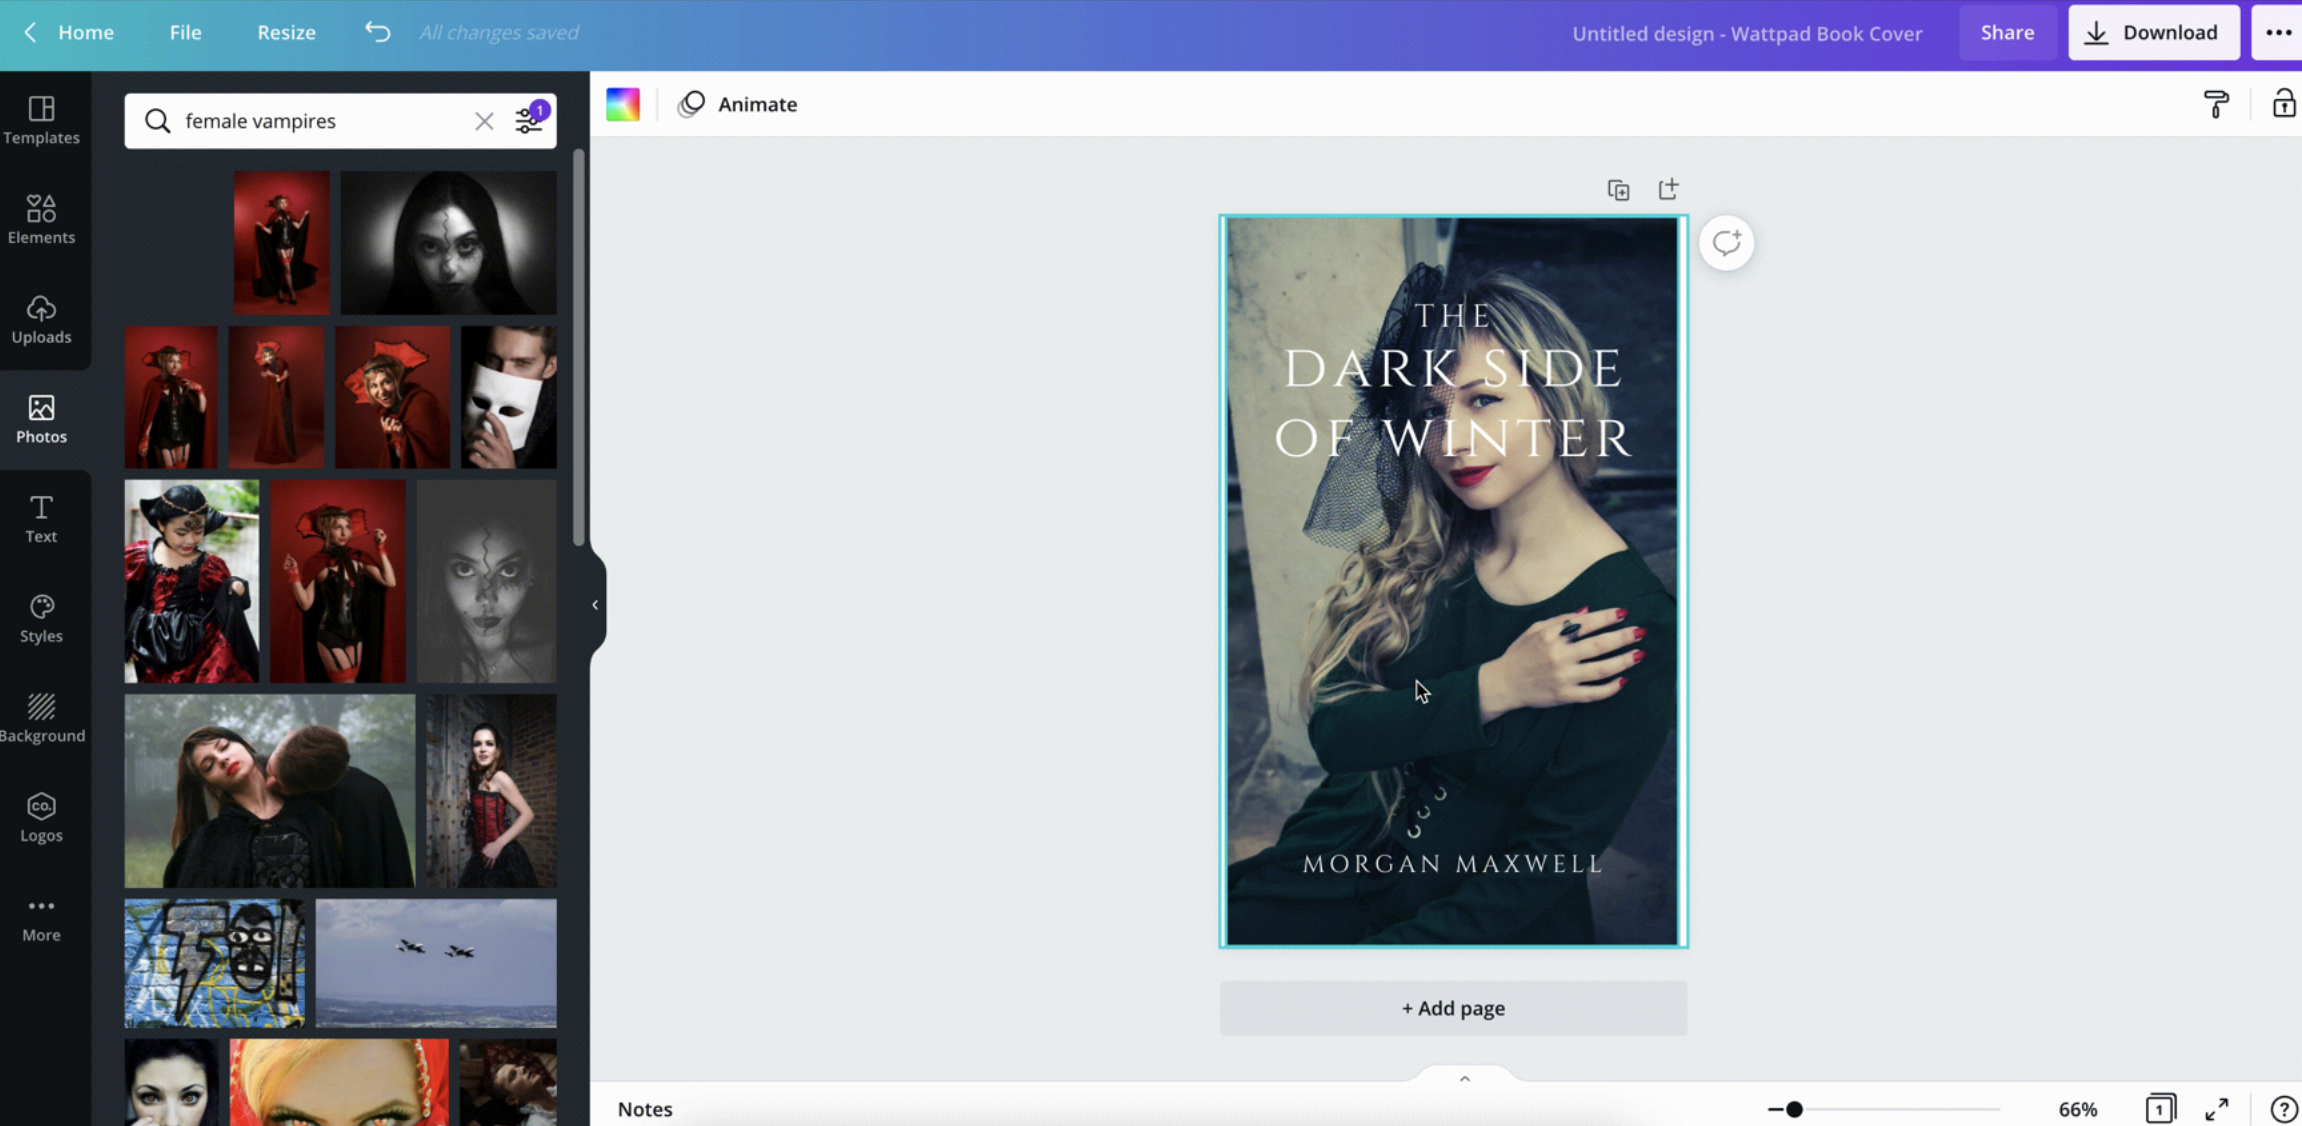
- For this example, we’ll pick the Wattpad Book Cover template called The Dark Side of Winter. It’s a very simple cover, with one image and an easy-to-read font.
- Since our make-believe book is about vampires, the cabin in this template isn’t exactly right. Let’s find an image in Canva that will work for our book.
- From the left-hand menu, click the Photos tab.
- Locate the search bar above the photos, and use it to search for female vampires. We can also filter by Free photos for those not on the Pro plan.
- Once we’ve found a photo we like, drag the image over and it will snap and become the background image.
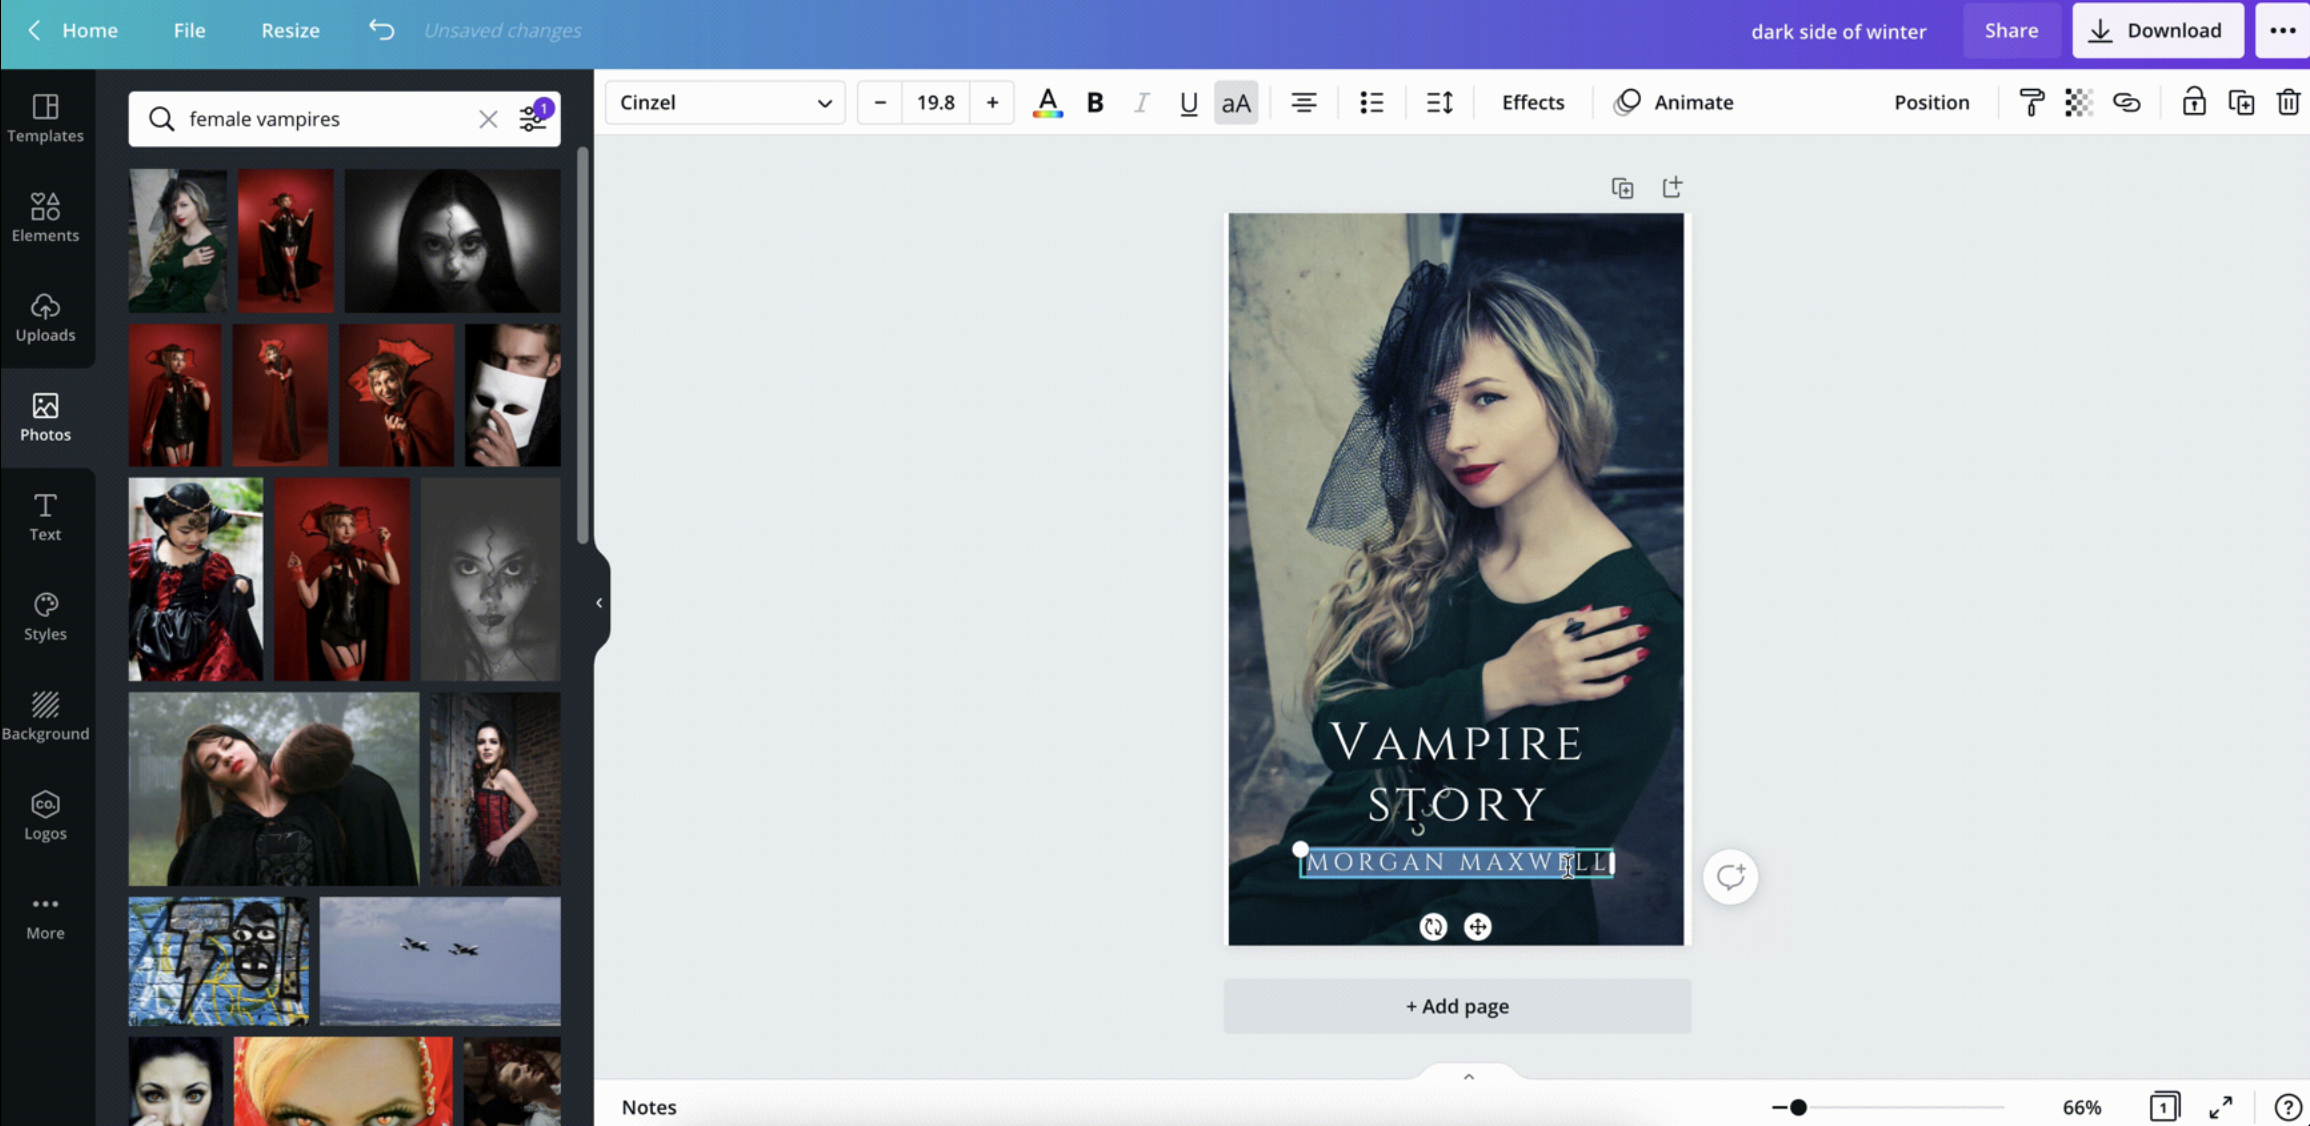
Now we need to change the text to our book title and add our author name. Simply click on the text to edit it.
- Click on the text to select it.
- For this example, we will need to move the text around because it is hiding key parts of our image.
- Just click and drag the text to the right spot, but keep it centered.
- Remove any text you don’t need by clicking on the text and then clicking on the trash can icon which looks like this:

- Click on the text again to edit it. Change the default title to your book title. You can also resize the text by clicking on one of the white circles that pops up around it.
- Edit the author name, or add in a tagline if needed.
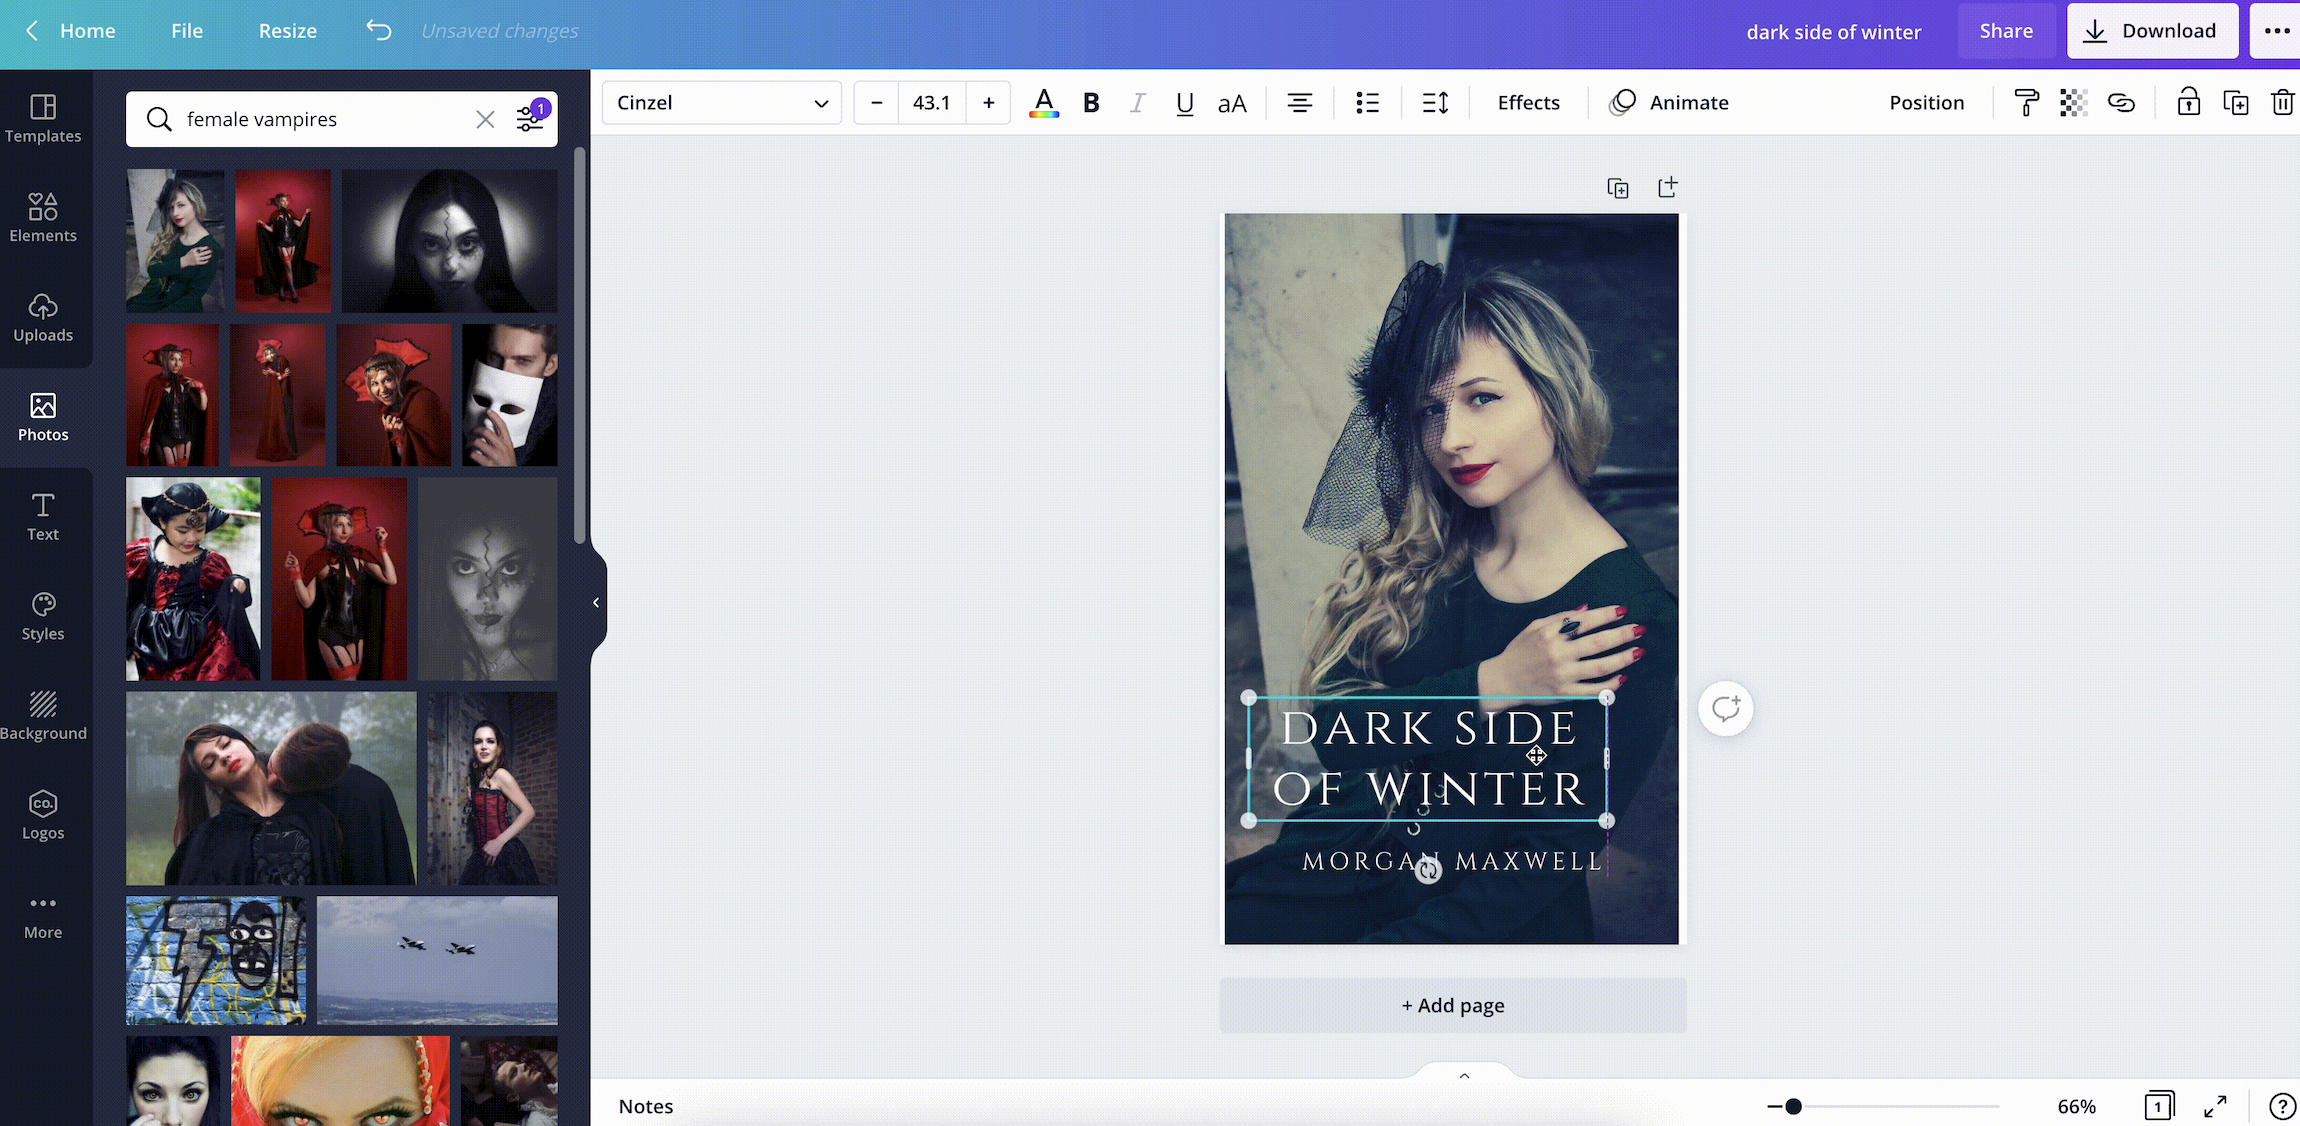
That’s it! You’re done. But…. let’s be honest, you’re not really done. You’re going to tinker with it, experiment with a few fonts, and try some different images. We get it. It’s fun! We recommend duplicating the cover and playing with the design so you have a bunch of different options in one Canva project.
- Once you have your book cover design done, make a duplicate. You can do this by making a copy, like we’ve previously done, or by clicking the duplicate icon on the right hand side of the cover.
- Make any changes you want. If you mess up, don’t worry – the original is still preserved!
- In the animation below, we use several techniques to change the image. We change the filter, the font size, the font itself, and try a few background images. Experimentation will yield good results if you’re patient. If you’re not patient, or find this process frustrating, go with the original Canva Layout, it will look great!
- Repeat.
- All your variations will be saved in the same Canva Project.
A Note on Canva Stock Images.
Canva has a ton of free images, but a lot of the good ones are considered “pro”. Pro images are part of the Pro or Enterprise plans on Canva, which start at $119.99/year. In our opinion, it’s well worth it to pay for a Pro plan on Canva because of the many options that are included – stock images being just one of the many benefits. As a comparison, stock images from most major websites like Getty Images or iStockPhoto will start at about $10.
If you can’t find a good image for your book cover, just use a template that’s mostly text. These book covers still look professional and are a good option if you struggle to pick imagery.
Canva has a great list of Book Cover templates you can browse. All of these are editable within Canva itself.
Wanting more tips on great book cover design? We recommend checking out the following resources:
- The 5 Most Common Mistakes in Book Cover Design and How to Avoid Them
- How to Find and Work with a Book Cover Designer
- How to Create a Best-Selling Cover
The Last Step: Getting Images out of Canva
Alright, now we know how to make all kinds of images for our book! The easiest way to get your images out of Canva is to hit the Download button and save them to your desktop. From there you can post them on social media, email them to your reader, or use them however you like.
Canva has a few more advanced options for sharing your images. If you’re planning to post it directly to Facebook, Instagram, or Twitter, you can post directly from Canva. This is a really easy way to generate social posts. You’ll need to connect your social media accounts in order to enable this feature, but it’s quick and easy to do. Additionally, you can use the Canva Mobile App (for iPad or iPhone) to access your Canva images and post them to more mobile-centric sites like Instagram or Pinterest.
Wrapping Up On This Awesome Book Marketing Tool
Hopefully we’ve shown you how to create some great marketing imagery you can use to help promote your book. As we discussed, Canva can help you create everything from Ads to Engagement Images to Book Covers. We think it’s a great option for authors because it won’t break the bank and it’s very easy to learn. If you still have any questions on how to use Canva, post them in the comments and we’ll do our best to answer them!
Once you’ve mastered Canva check out these free book marketing tools.