Our goal at Written Word Media is to walk writers through every step of how to self publish a book, and a vital piece of the puzzle is learning how to format eBooks.
Keep reading this article to find out…
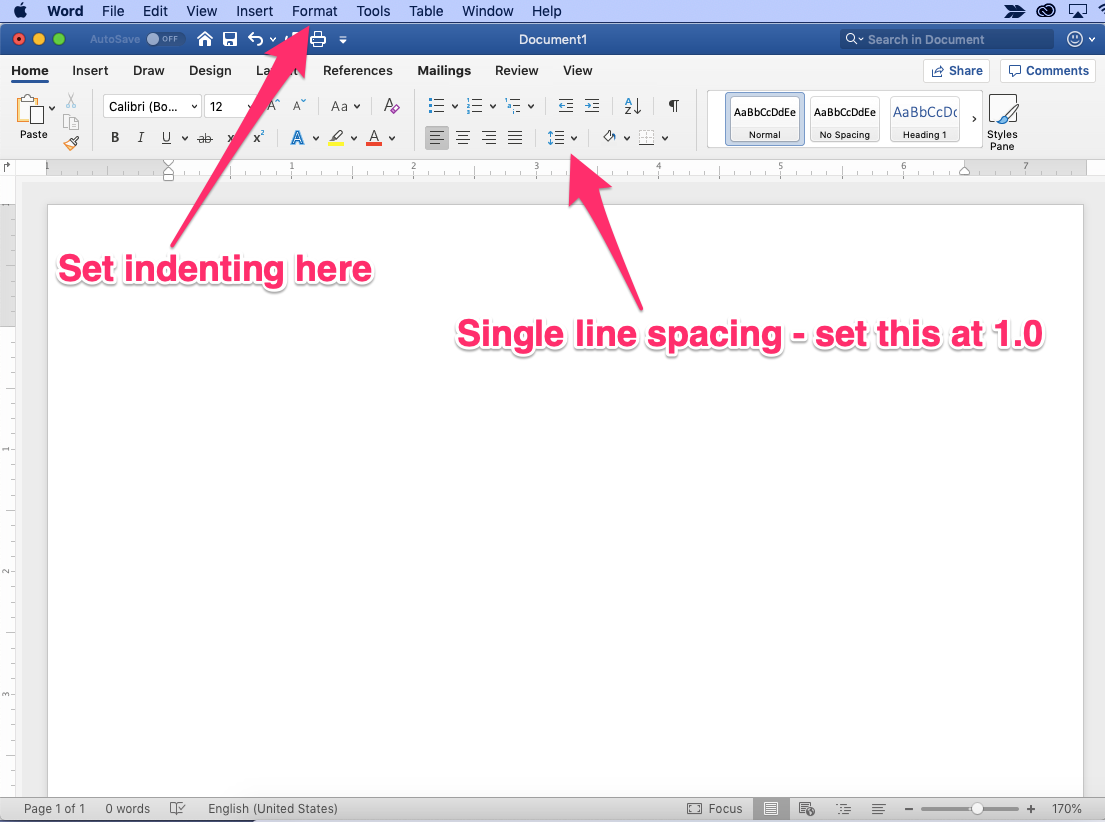
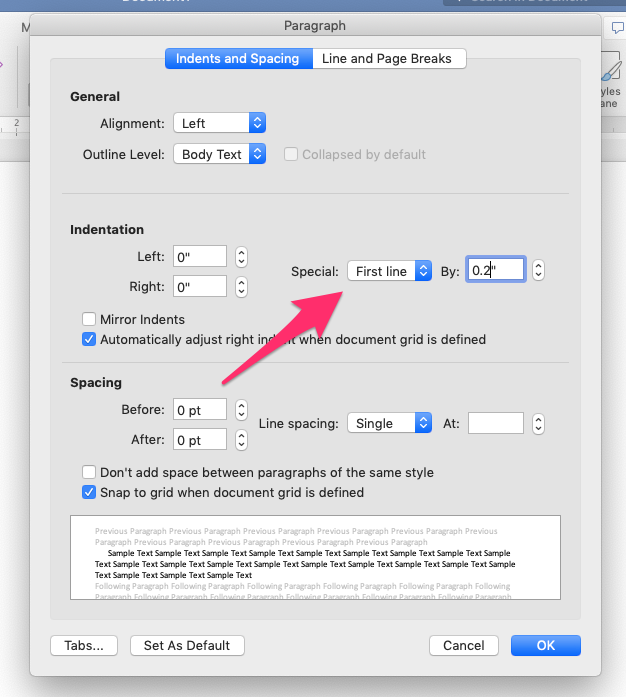
To make sure that your eBook displays correctly and consistently on eReaders, you’ll want to indent paragraphs (tab spacing doesn’t convert to Kindle) and set proper line spacing. To accomplish this,
Some writers will prefer to add stylistic flair or formatting to their eBook – this might include images, page breaks, chapter titles, front and back matter, or a table of contents.
To include your own image in Microsoft Word, select “Insert” in your menu bar and then click “Pictures –> “Picture from File…” This will enable you to upload images of your choosing from your computer. For an ePub file, you can insert images into text as you usually would for any document. Note that images will appear in black and white on some tablets such as Kindles.
You might want to put page breaks within your book. This is a helpful way to designate the end of a chapter with formatting. To insert a page break in Microsoft Word, make sure that the cursor is where you want your break to be. From there, select “Insert” in your menu bar. Then, click “Break –> Page Break” from the dropdown menu. Voila, you’ve successfully inserted a page break!
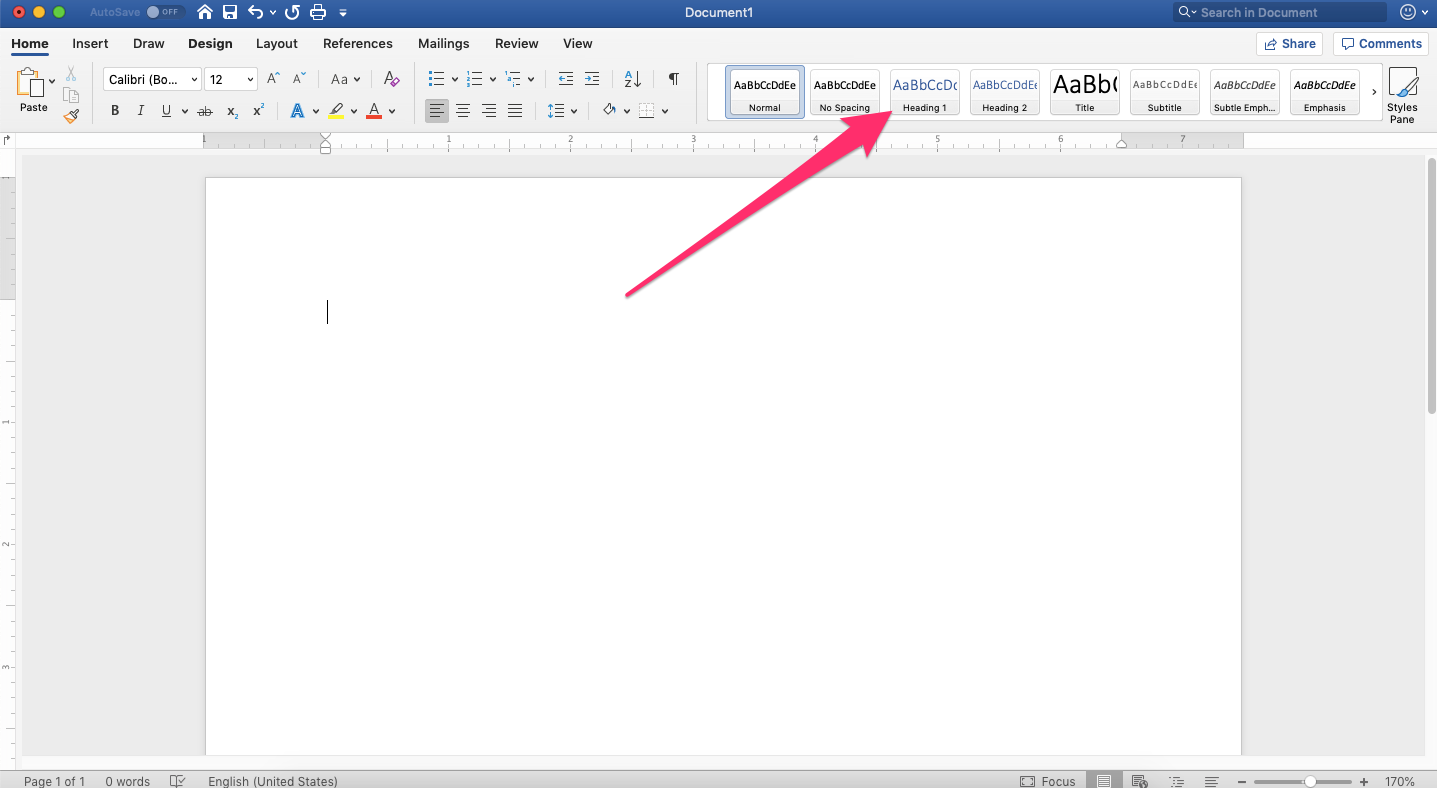
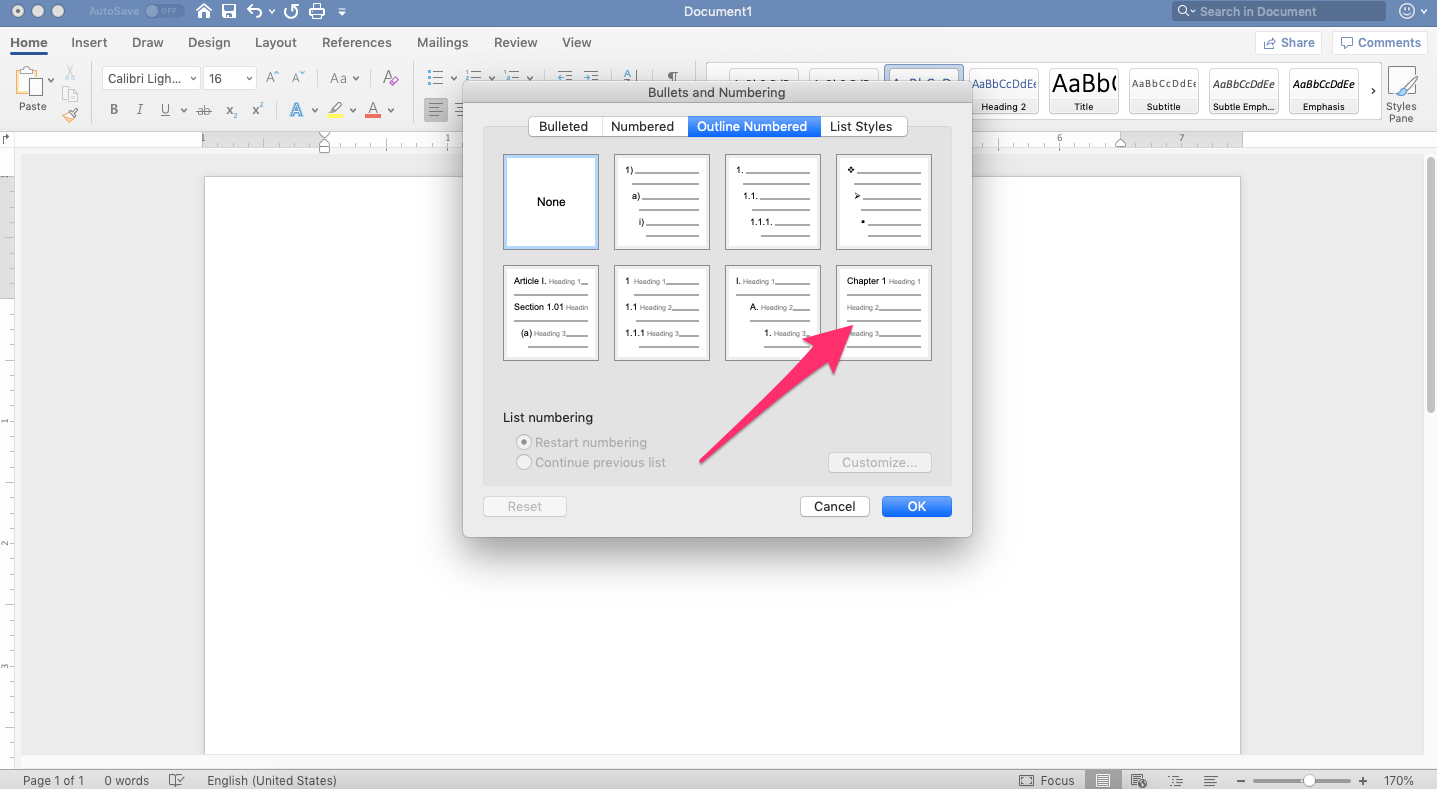
1. Select “Heading 1” on the Home toolbar.
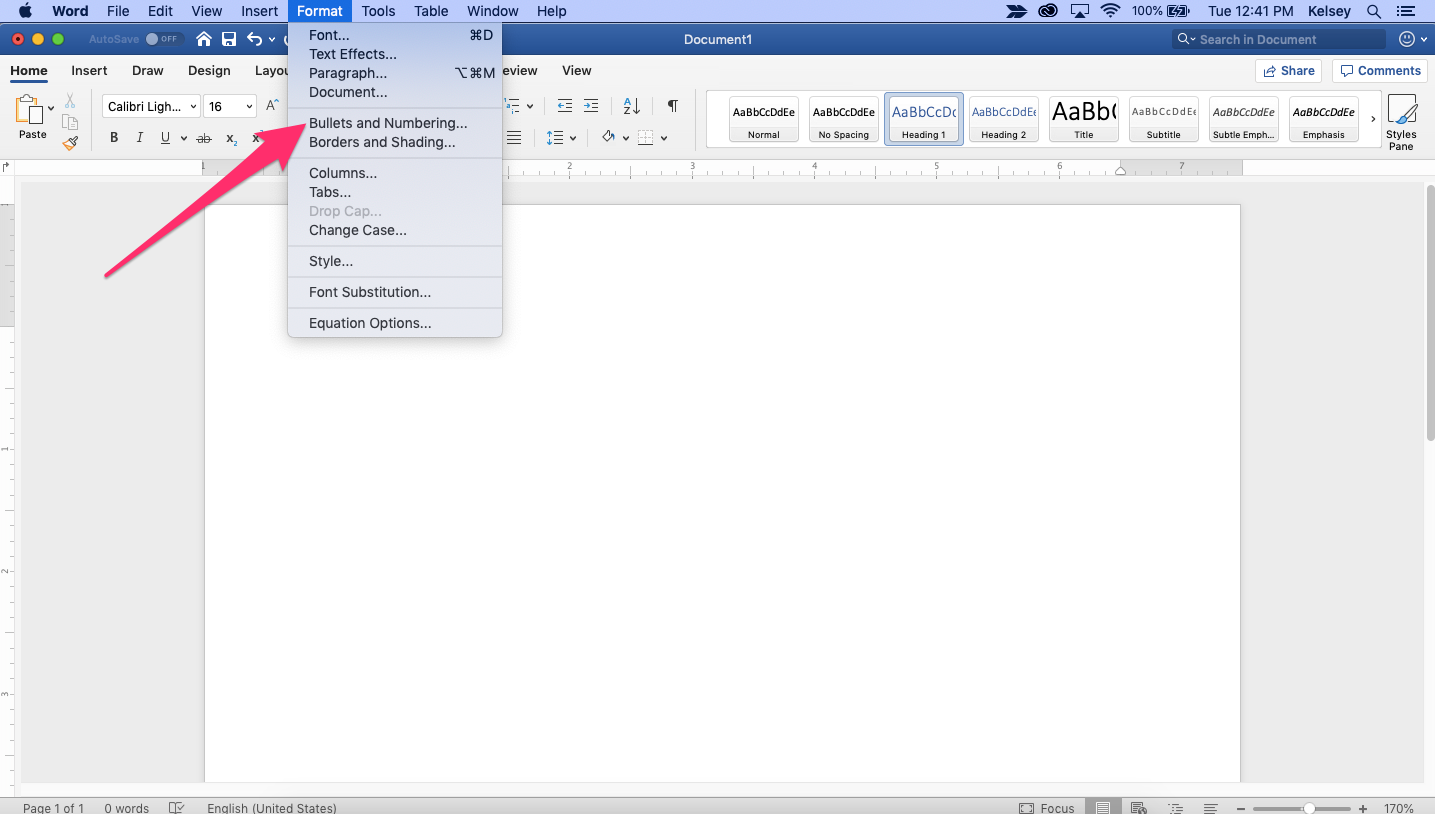
2. Select “Format” and then “Bullets and Numbering”.
3. Under the “Outline Numbered” tab, see the very last option that shows “Chapter 1”. That’s what you’ll select.
While you can also create chapters by centering a chapter name or number at the top of each page, we recommend doing it through Word’s tools. Not only will this translate better for an ePub file, but you can link your chapters to a table of contents page to easily navigate your document.
If you want to add front or back matter to your document – such as an epigraph or about the author page – you would add these in just like any other chapter. Just make sure they’re named accurately (for example, you wouldn’t name your title page “chapter 1”).
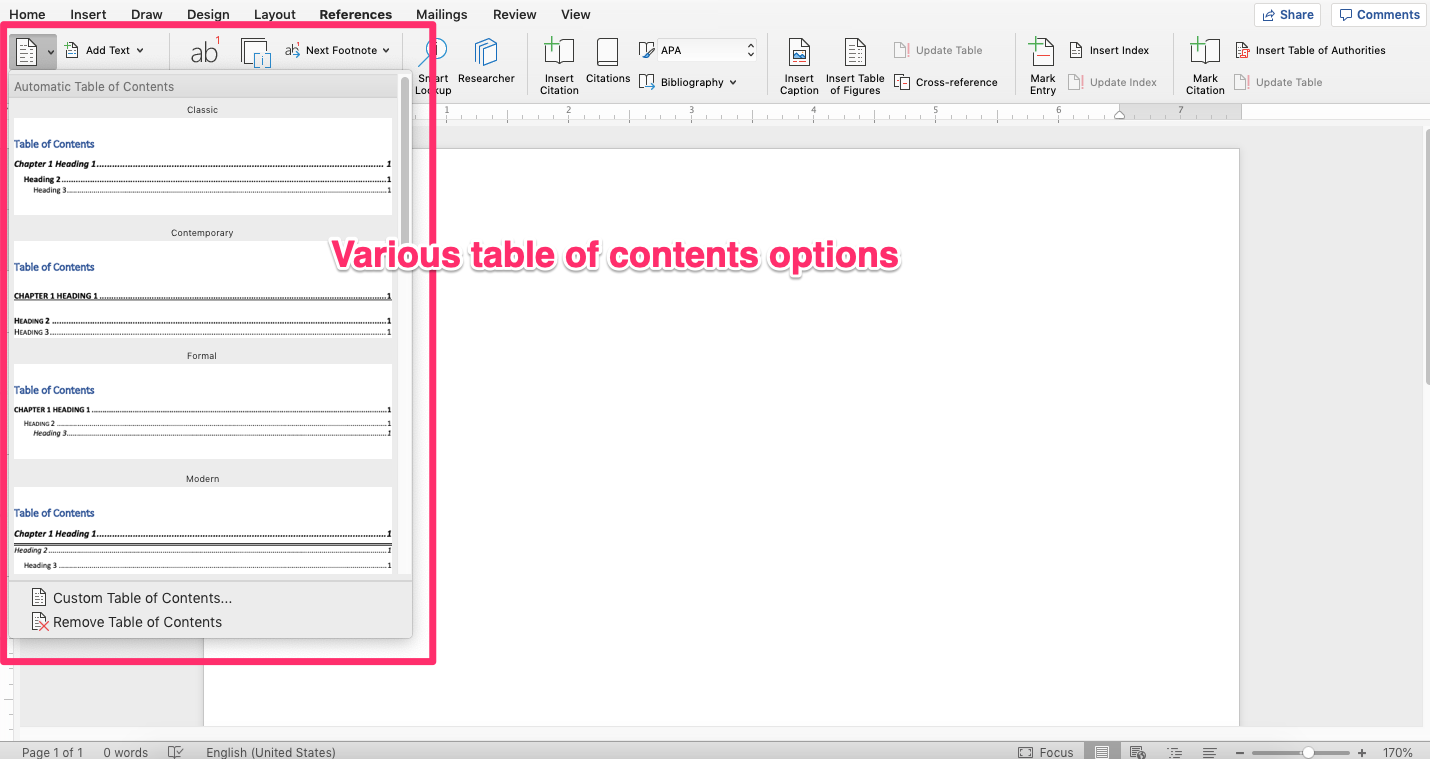
If you’re interested in creating a table of contents, do so after each chapter has been created. Once your chapters are created by using “Heading 1”, select “References” from your toolbar (this is the part of Word with options like Home, Insert, Draw, and Design – you should see it at the top of your page).
There, at the far left side of the screen, is a button for “Table of Contents”. Select the style that looks right to you.
In order to get your document converted from .doc to ePub, you’ll need to rely on tools. Unfortunately, Microsoft Word does not currently have the ability to do this. Some popular programs to use for the ePub conversion process are:
If you want to pay for more in-depth program that allows you to add content like front and back matter, adjust styling, and produce files for both print books and ebooks, you might be interested in either Atticus or Vellum. Vellum costs $249.99 and only works on Mac. However, Atticus is only $147 and works on both Mac and PC. You can also hire a professional book formatter like Ebook Launch.
Please note that if you use any of the following tools, or happen to own them, you can export your document directly into an ePub file:
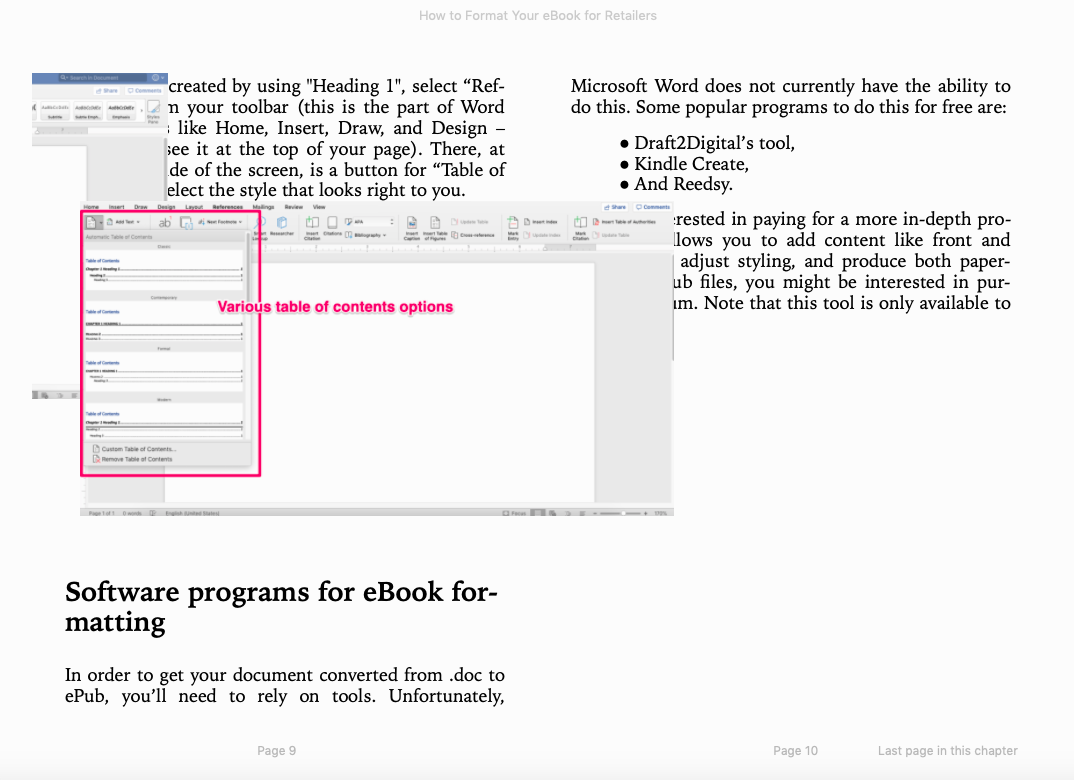
Personally speaking, I used Google Docs to practice turning this article into an ePub file. Although the images didn’t convert well, my text was all in place and my ePub file created page numbers for my “book”.
Below, check out what an ePub file (with images) looks like converted from Google Docs.
While Scrivener needs to be paid for and Apple Pages is for Mac users only, Google Docs is the free, Mac and Windows-friendly option for writers.
If you’re interested in learning more about tools and programs like Scrivener, take a look at our article on Software Tools for Authors!
One more tip! If you are looking for a free way to make professional book formats. Kindlepreneur has designed a free Word Doc template generator for formatting. Here, an author can go and select a trim size, and then the style and download a word doc that has all the proper settings and systems in place for the print version. Worth a look if you will be working in Microsoft Word!
Once your eBook has been formatted and an ePub file has been created, it’s time upload to online retailers. For an in-depth walkthrough on how to start selling your books through Amazon, Kobo, Google Play, Barnes & Noble, and Apple be sure to check out our articles: