

One of the best ways to connect with readers is through email. Having an active email list of readers is a must for any author who is serious about selling books. One often overlooked, but very important aspect of managing an email list is to make sure your readers get a welcome email when they sign up.
Welcome emails can have 2-3 times the open rate of a typical email, and it is the first step in building a connection with a reader. Email service providers like Mailchimp typically offer an easy way to set this up. In this article, we’ll walk you through how to set up a welcome email using Mailchimp’s Automation feature. This article is teeming with images and helpful screenshots to make setting up your welcome email as easy as possible for a busy author like yourself.
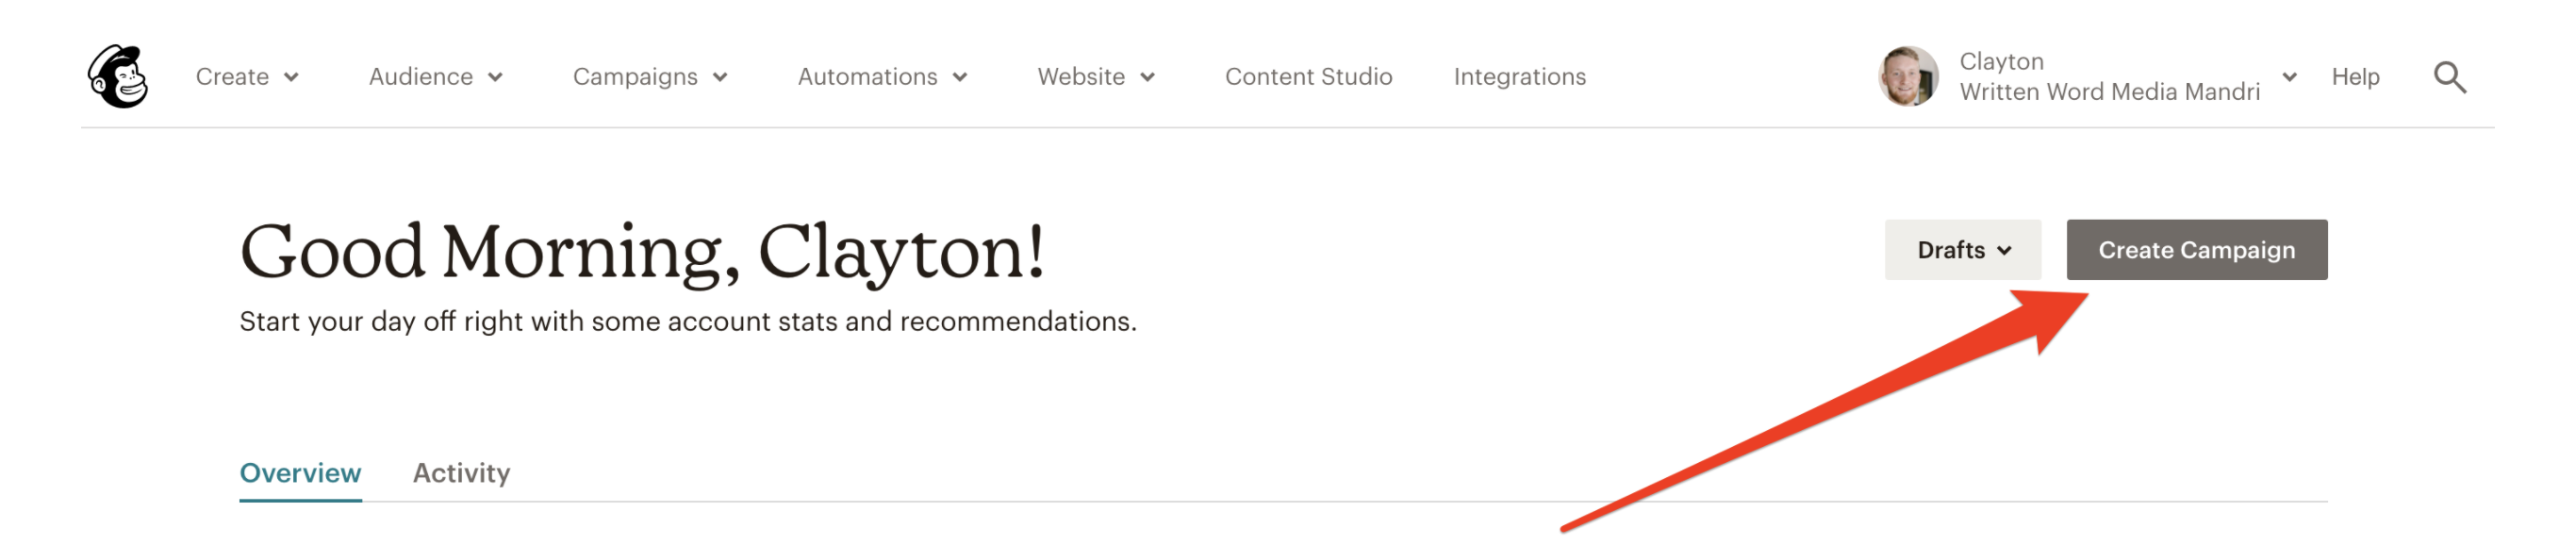
Step 1: Login to Mailchimp and hit Create Campaign.
Mailchimp has an easy way to get your welcome email fired up! They now offer their Single-Step Automation features (including welcome emails) for every pricing plan (including their free plan!). You can learn more about their different pricing plans here.
The Essentials paid plan from Mailchimp starts at $10/month and we think it’s well worth it, although it is not required to get basic automation setup. (Note: The larger your mailing list size, the more you will have to pay for a Mailchimp plan. Be sure to utilize the ‘Calculate your price’ link listed under each plan’s price to decide which plan and pricing option are best for you.)
Once you have picked a plan and logged in to Mailchimp, you are ready to set up your automation. Click Create Campaign.
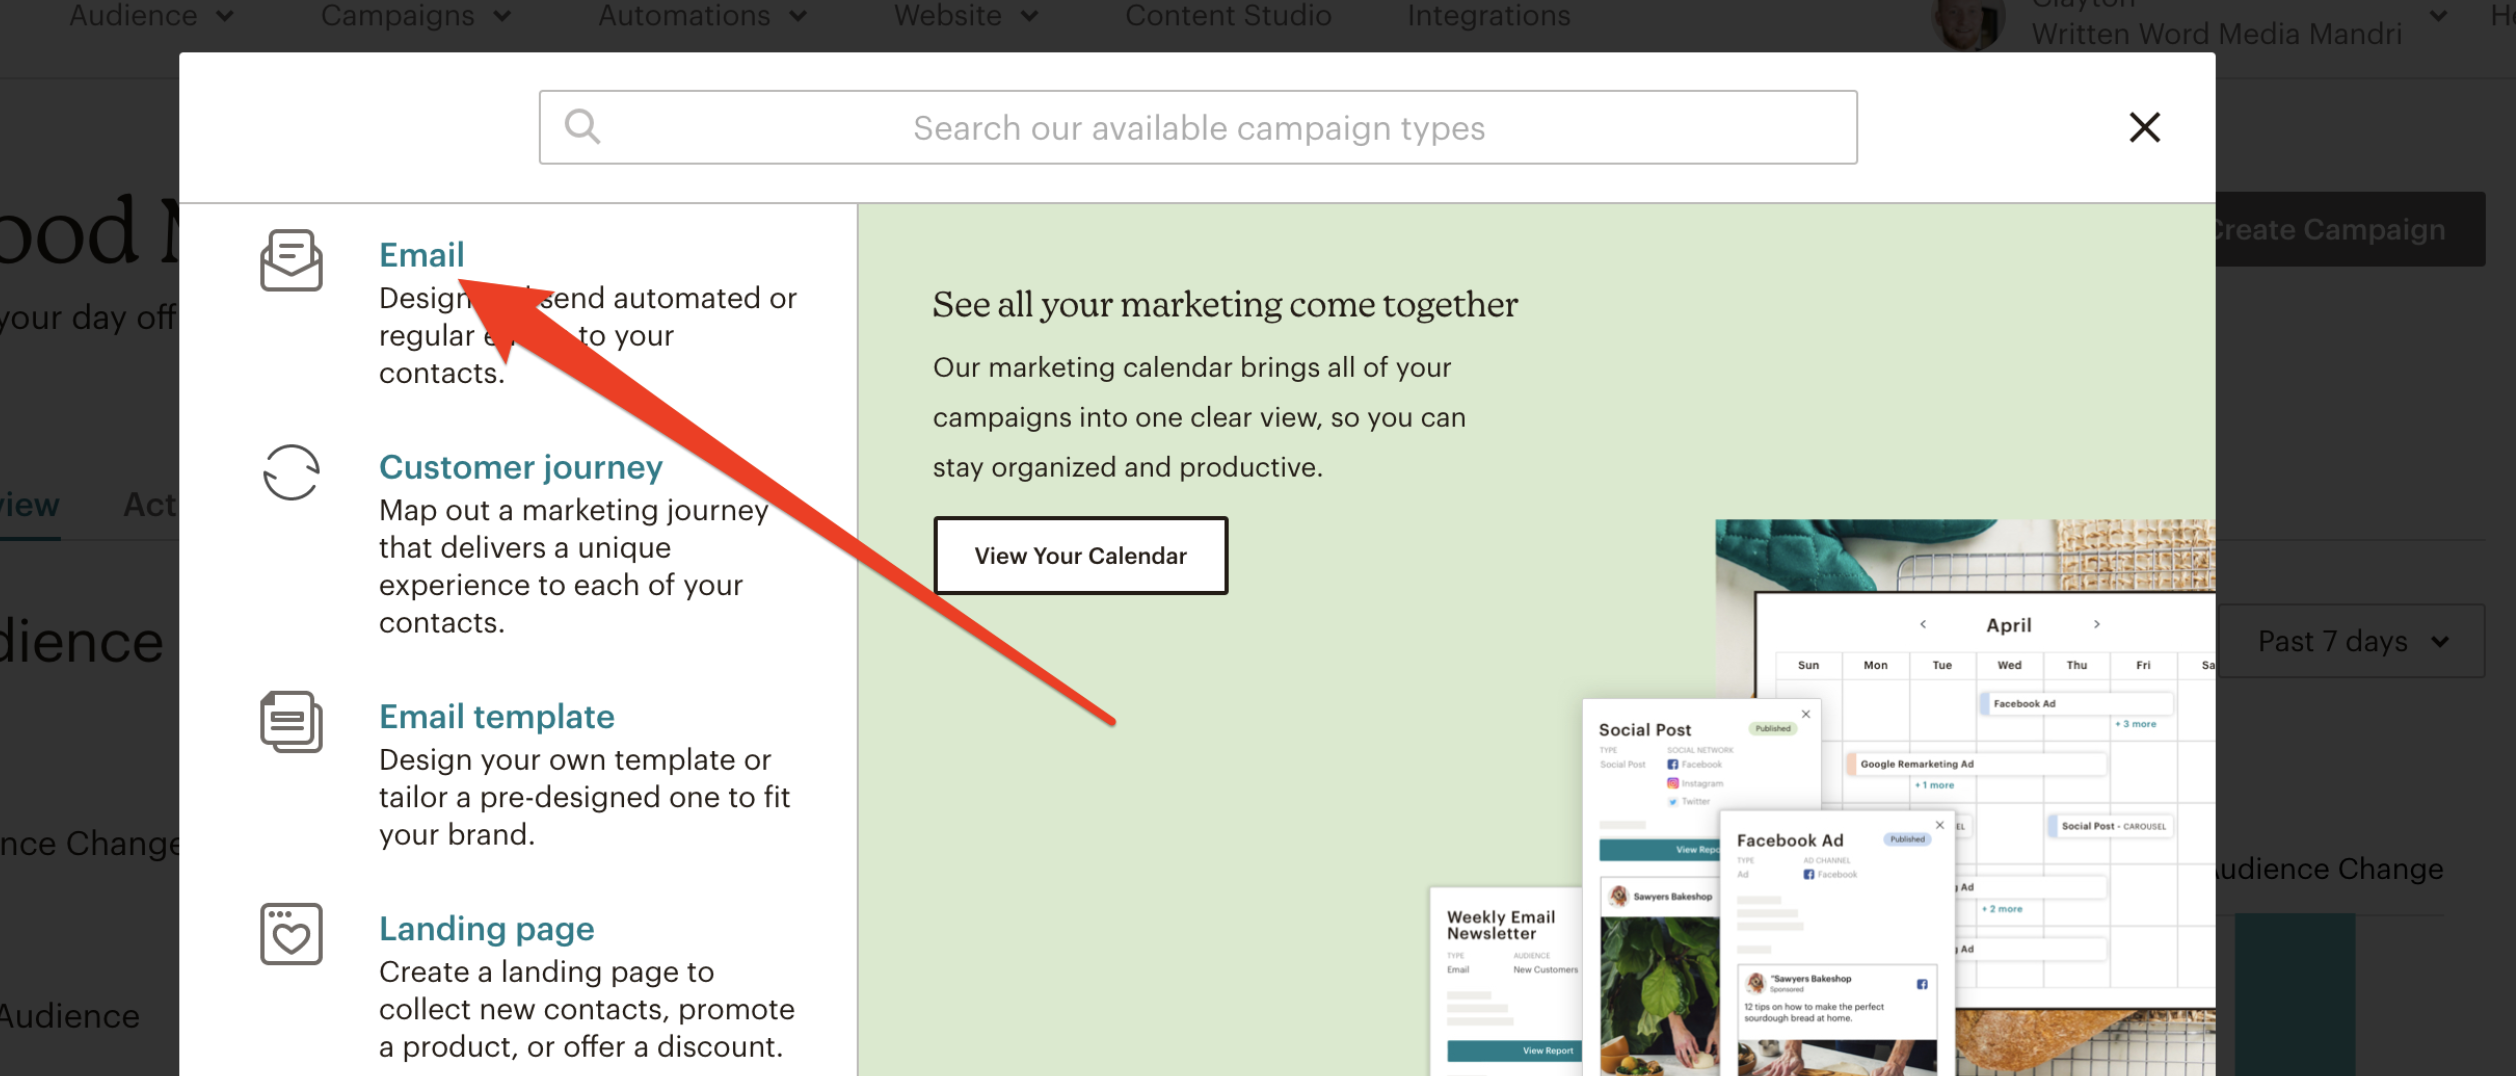
then choose Email.
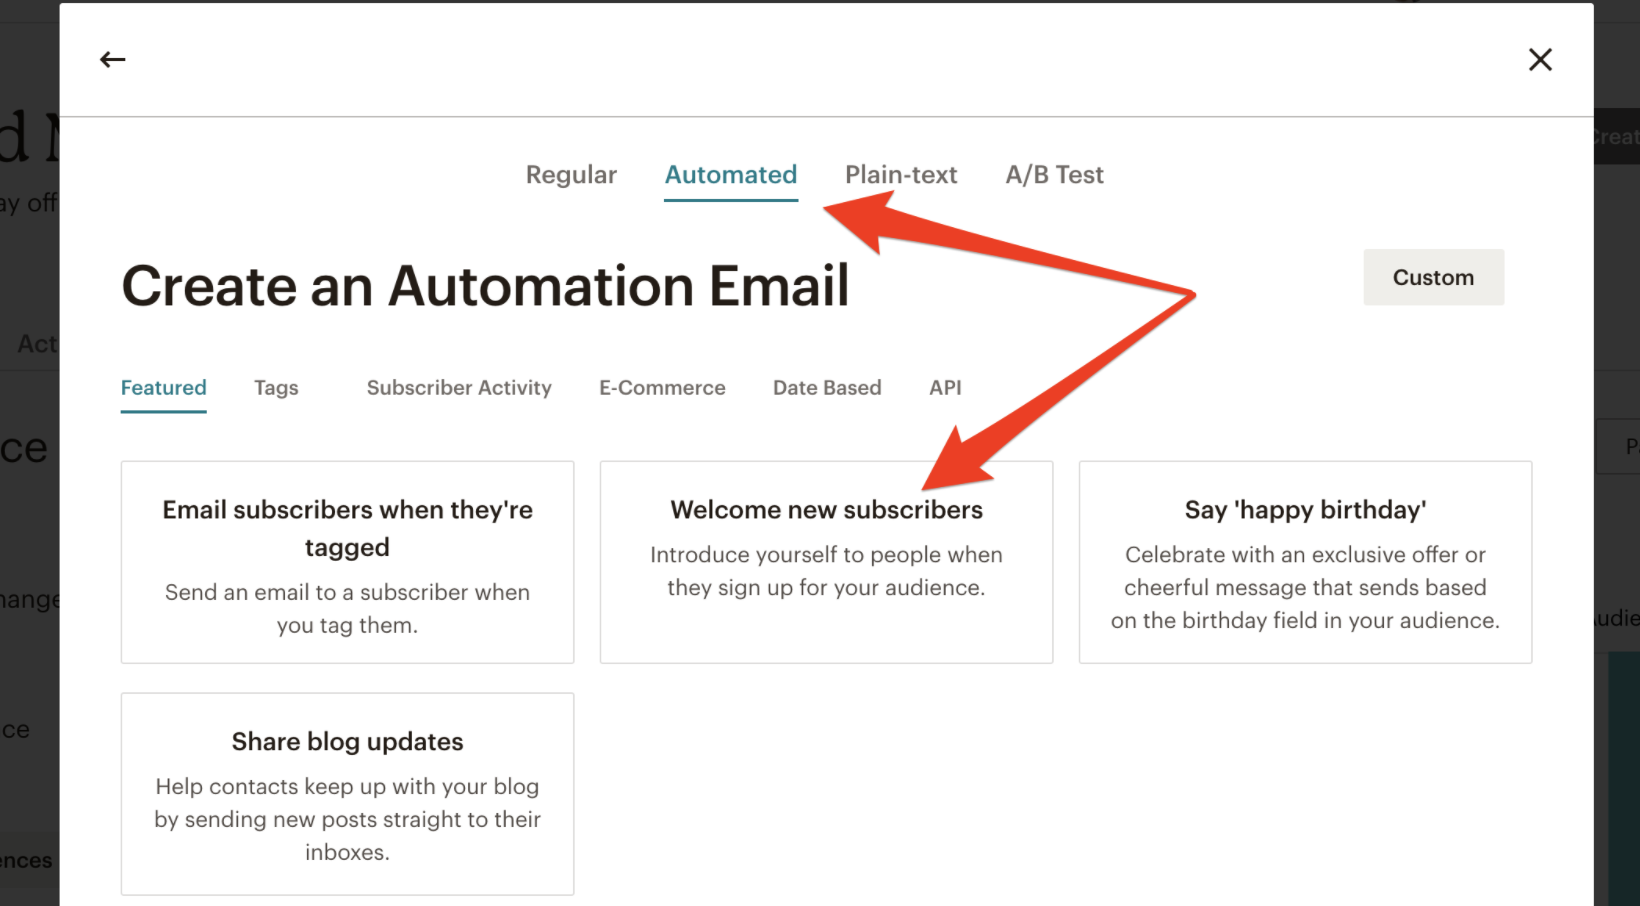
And select Automated and Welcome New Subscribers.
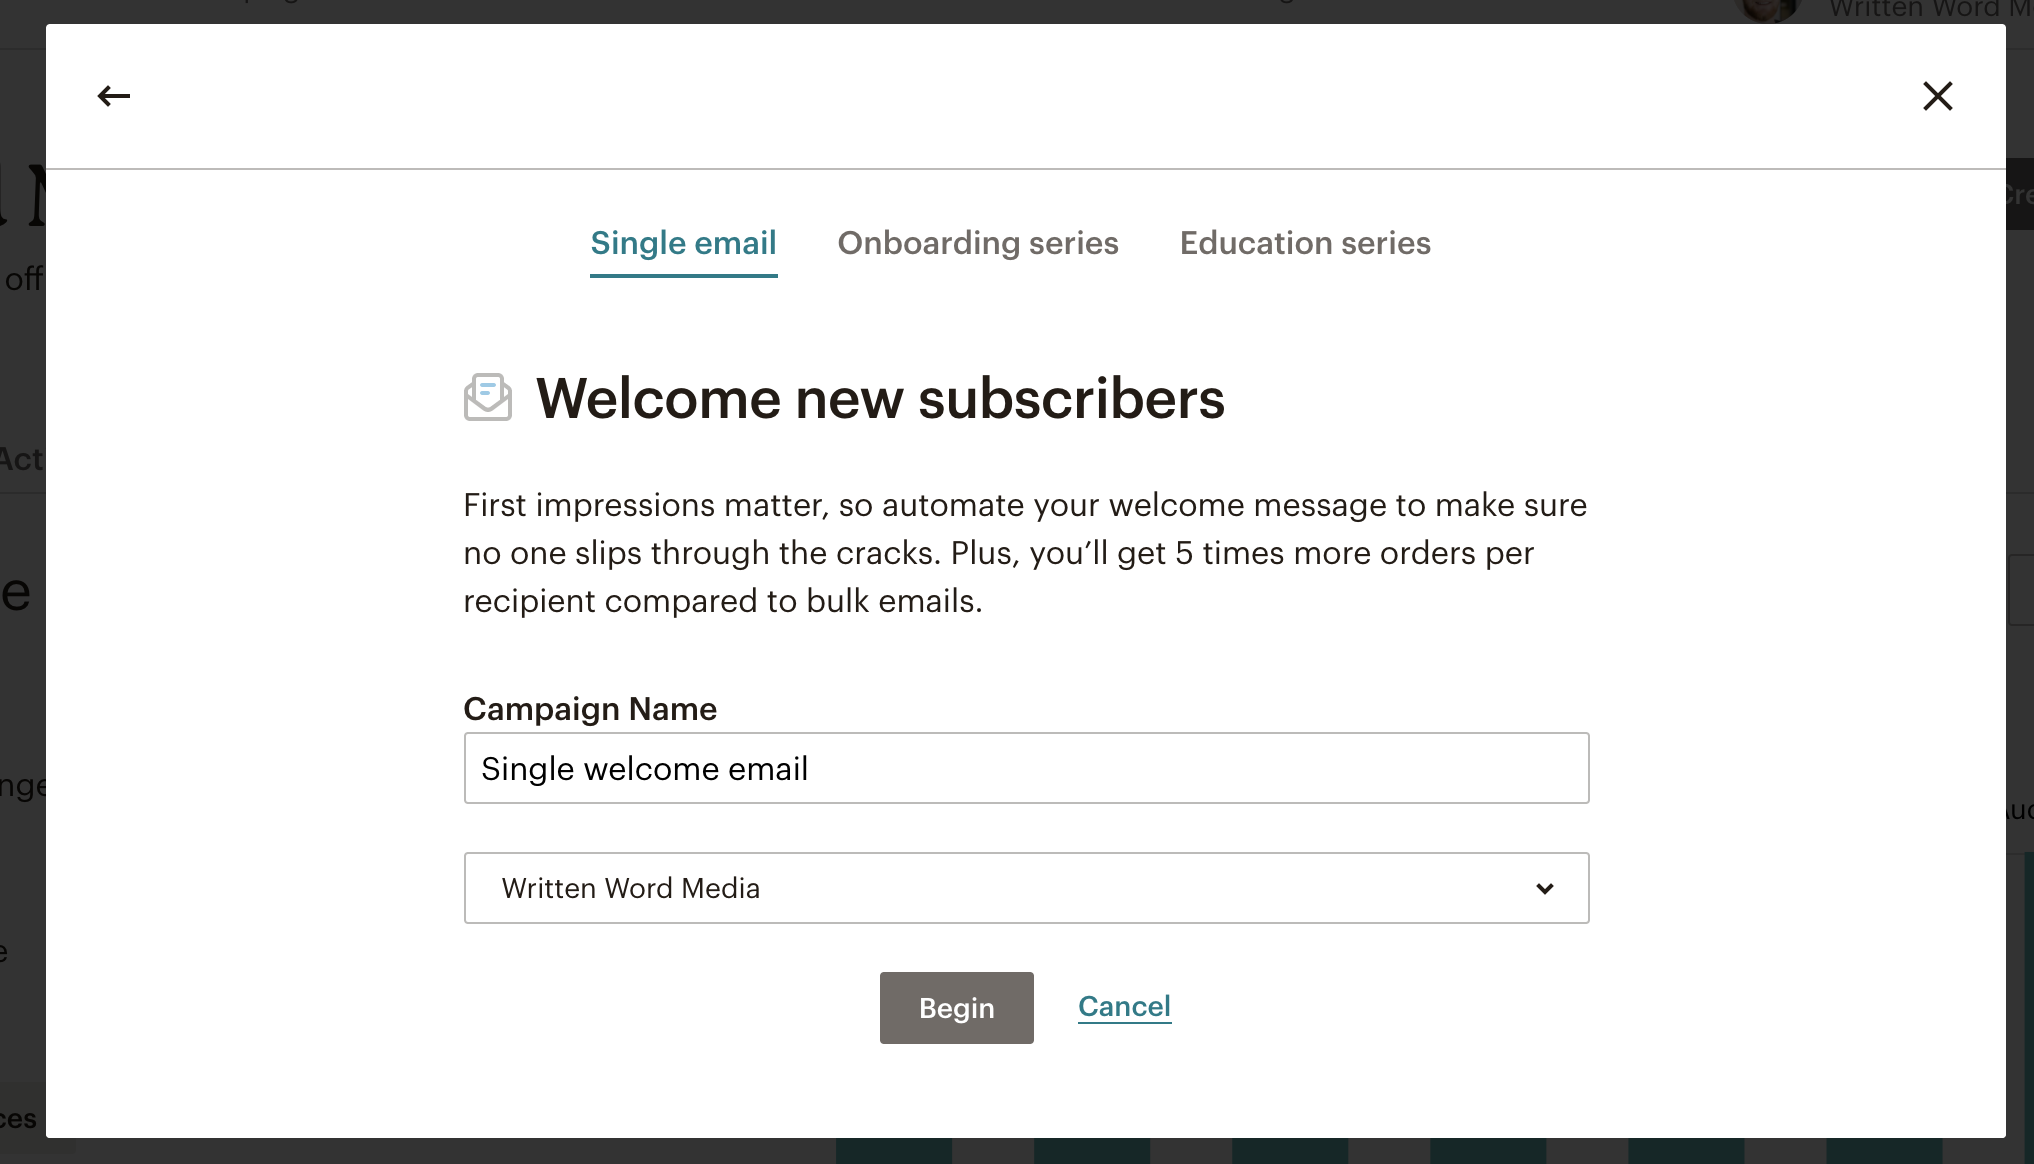
Step 2: Name the Automation and Select a list
You’ll need to give your automation a name. We recommend naming it something simple like “Welcome Message.” As you become more advanced, you can name your automated emails fancier names but, to start with, let’s stick to the basics.
You will also need to select a list. Most authors will have just one list, so this is an easy choice. You will want to make sure to choose the list where your readers are. Once you’ve entered your automation name and selected an audience, click Begin.
Step 3: Customize the Default Email
Mailchimp will take you to your Campaign screen, which is where you can see and customize the different parts of your email such as email name, subject line, sender information, content, etc.
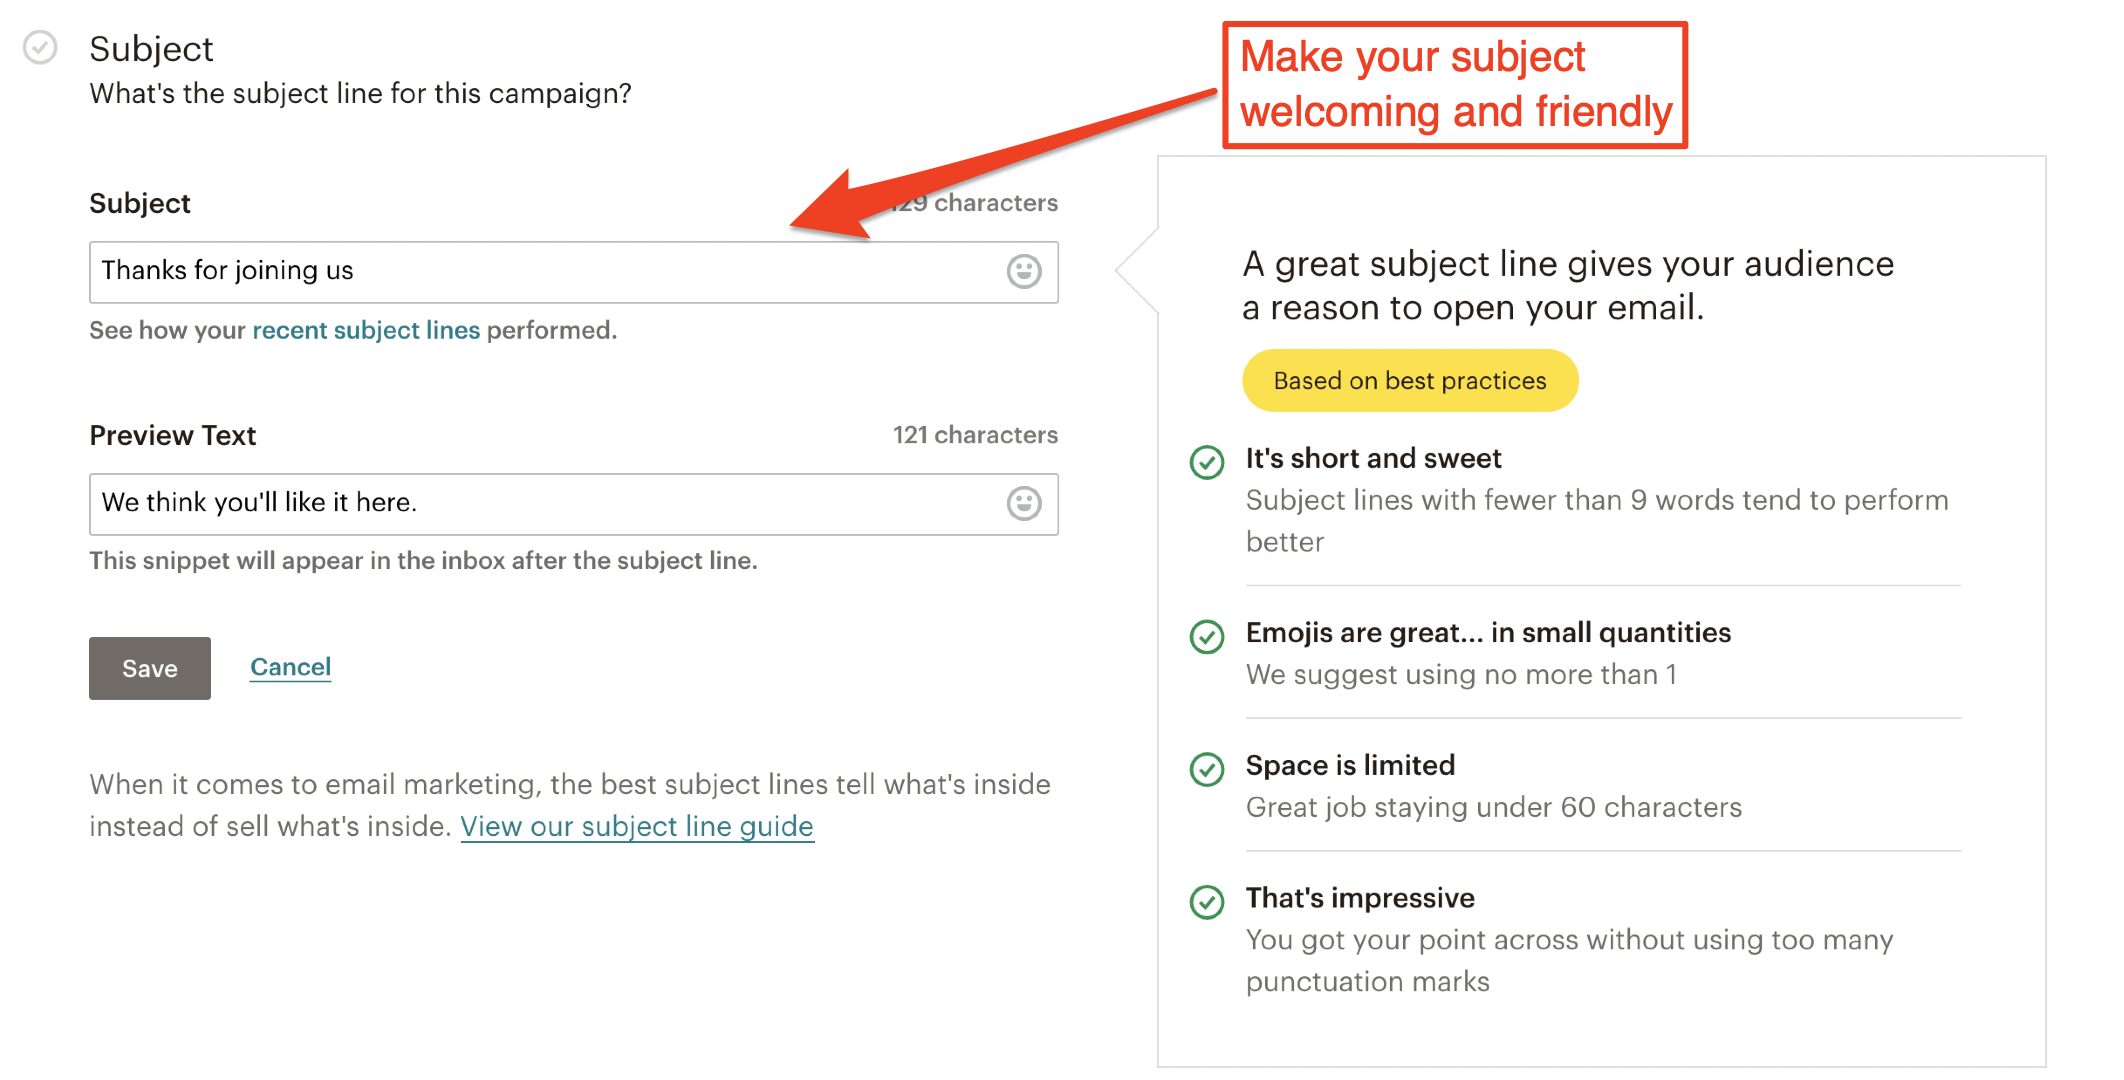
You’ve already named your email “Welcome Message”. Next, you will need to set the email subject line. We recommend you take this opportunity to welcome your readers, so use a subject line like “Welcome to the mailing list for [author name]” or “Thanks for joining my mailing list”.
Next, you’ll need to update the sender information to let readers know who your emails are coming from. Your author name and email address should be in there by default, but if not, make sure to add them in. Make sure the Author name is correct, and if you write under a Pen name, use the Pen name, not your real name.
The from email address is a very important aspect of this whole process. Make sure you are using an email address from your website (like jack@jacklondonauthor.com), and NOT a free email provider like Gmail or Yahoo (jacklondon42@yahoo.com). This puts your email in compliance with DMARC, which is a complicated, but important rule. You don’t need to understand it completely, but you do need to stay away from using free email providers. If you don’t have a website, we can teach you how to get one yourself with this course.
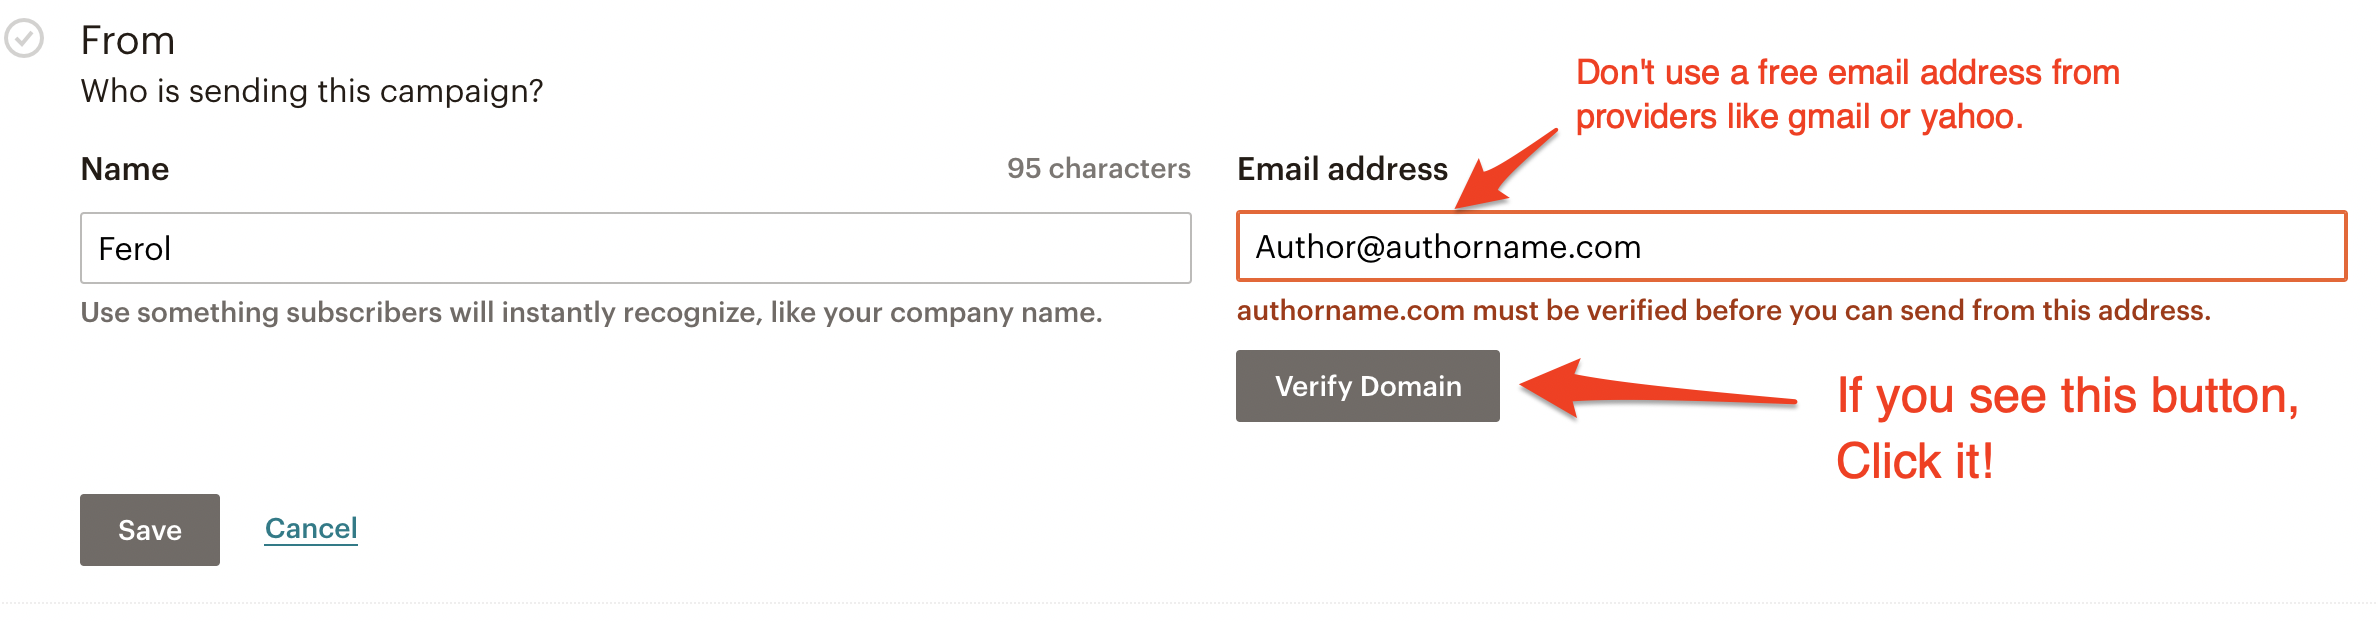
Important Note: If you see a ‘Verify Domain’ button next to your email address, click it! Verifying your email domain is an important step to make sure your emails stay away from spam filters. All you have to do is click the button that appears. Mailchimp will send you an email; click the link that appears in that email and you are verified—easy as pie.
Step 4: Pick a Template and Design Your email
Mailchimp has LOTS of options for templates. They have ‘Themes’ which have pre-canned designs with imagery in them. They can be fun to look through, but you are better off just using the ‘Basic’ 1 column template. We have found that the more simple the email, the better it does. You will see the basic template designer sitting there. It can be a little overwhelming to think about designing an email from scratch, but follow our instructions and you’ll be fine.
- Image: If you have a great image that is 600px wide, pop it in, if not, don’t worry at all. Just delete the image block. If you really want to create a great banner here, we recommend using Canva. It’s web-based and easy to use.
- Text: Click on the text of the email, and Mailchimp will slide in the email text editor on the right-hand side. You can see our example in the image below from Jack London. Feel free to use this as a template, but add your own flair to it. Make sure that your readers know what kind of emails you plan on sending and how grateful you are to have them on your list. Don’t make your text too long; 3-4 sentences should do the trick.
- Merge tags: Merge tags enable you to personalize the email to each reader. The easiest way to get started with merge tags it to include the *|FNAME|* tag. *|FNAME|* will automatically pull the first name of your reader if you have asked for that information as part of your signup form. If you are not asking for First Name, simple use a generic term, like Reader and skip this step.
- Call to Action: This is a fancy word for a button. Do you need a button in your email? The answer is YES. All of your emails should have a button in them. You can drag and drop a MailChimp button into your email right below your text. If you have a free book, link to it here. If you don’t have a free book, add a link to your website, or you can link to social media profiles. The important thing is to give your readers a way to engage with you more deeply if they want to.
- Lead-In: A lead-in is a really important part of your email. It’s that part that a reader sees after the subject line. Mailchimp makes it easy to customize this. Users will always see your subject line, so your lead-in should be different information. You don’t need to say welcome twice, we recommend something that personalizes the message and speaks directly to the reader.
When your email is all designed, click Save & Continue.

Step 5: Activate your campaign
Almost there!
If you skipped that part about verifying your ‘From’ email address, MailChimp is going to give you some flack for it. You’ll just need to suck it up and get a non-free email address. If you use a service like Squarespace for your website, you can get an email address pretty easily through them. MailChimp may give you a warning about what it calls ‘Social Cards’—if so, you can safely ignore that warning.
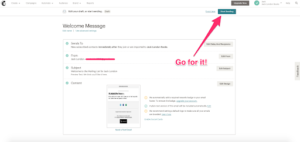
Click the blue Start Sending button at the top of the page to kick off your welcome email.
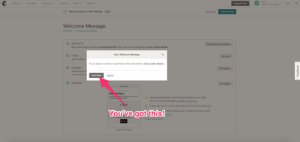
Then, select Start Now on the popup that appears.
If it went well, MailChimp will show you the Rock n’ Roll monkey hand to let you know you are done.
That’s it! Now each time a user signs up for your email list, they will get a welcome email. This is sure to engage your readers more deeply and boost follow on sales.
Having trouble? Wish there was another screenshot in here? Just ask away in the comments and we’ll do our best to give you answers and update the post.
Thanks for the detailed instructions, Ferol. Is the “entry level” paid plan of $10 you describe only for accounts with zero subscribers in their lists? I’ve been quoted $25 per month because I have almost 2000 “subscribers” – even though I send less than one email a month and I haven’t yet turned my subscribers into fans. I’d like to be able to play with automation without committing myself to a hefty monthly bill while I learn what works.
Virginia, you are right, it looks like MailChimp has updated their pricing. It will cost you $25/month to make use of the automation. I’ve updated the article to reflect that. We still feel it’s worth it given that email is one of the most effective marketing tools for authors.
How much does the Automated version of MailChimp if I have less than 1000 subscribers?
Just stumbled upon Ferol’s post and I noticed your question. You can visit the MailChimp page and click on PRICING and it has a little calculator to let you know what your monthly bill would be. Here’s the link: https://mailchimp.com/pricing/b/?utm_expid=73574462-70.lBKKJrEYSEuFng-KVGl9mg.1&utm_referrer=http%3A%2F%2Fmailchimp.com%2F
I’m assuming this also works if you add in your subscribers manually? My business is using a platform whereby I can’t integrate MailChimp into the website, I had just planned to add them to my “Client List” once they signed up as clients/customers.
Clark, you are correct. If you add your subscribers to MailChimp manually through an import, the automation will still work. Thanks for reading!
Hello Ferol
I just set up the automation list in mailchimp. However, after setting up everything, I’d just noticed that I’ve been setting up the automation in the wrong list. How to edit the list name in automation?
Hi Nina,
Thanks for reading! Unfortunately, there is no way to change the list once an automation is setup, sorry! You will need to re-create the automation using the correct list. One way to save yourself a bit of time is to save the existing email as a template, then when you go to setup the new automation on the correct list, you can pull up the template in the design phase. You will still need to re-do all the logic, but it will save you the email design step. Sorry there’s not a better way.
Ferol
Hello Nina, Of course you can, on the existed automation list, you choose the one list u put the wrong list and click the button next to “edit” u choose replicate (that actually means that Mailchimp will copy paste your automation campaign to another list)
the one campaign***u put the wrong list
Good news! Automation is now included in all Mailchimp plans (included the free one).
Just a question about the “Trigger when subscribers are imported” checkbox. Does it work also when I add a new subscriber (with subscribed status, not pending) using Mailchimp API?
Paolo, it appears you are right Automation is now included in the free plan! I believe adding a subscriber through the API will trigger the automation, but you would need to confirm with MailChimp to make sure.
I am pretty sure the automation will be triggered if I add a new subscriber with pending status (because it will be triggered when the user confirms the double opt-in). I will test the subscribed status.
Hello,
I have a situation on my automation sequence! I actually ask for people to sign in an opt-in form and with that e-mail i do all the automation stuff!
The thing is that after 4-5 autoresponders i send them a sales mail (in which there is a link which redirects the user to an opt-in form again which leads to a sales page etc) If someone does not buy what i am selling, in the first sales mail, i have put 2 additional mails for re-engagement to be delivered to them in the next days.. and here is my question:
If someone buys from the first mail, the next two mails (re-engagement) are unnecessary, so i don’t want to be sent to this buyer! How do i fix that on the workflow!
I have to mention that i am on a free account on mailchimp! (If that is appropriate for answering me!)
87 “how to” articles later, I found this one and FINALLY have my welcome email up and running. Thank you!
I created an email in “campaign” and now I want to create an automation for this email. Is there any way I can just link the email to an automation? Mailchimp just keeps asking to create a new email? Is there any way around this?
Hi Marlo, Unfortunately, the answer is no. MailChimp makes you create the email from scratch in the Automation tab, you can’t link a regular campaign to automation. You should be able to copy and paste the content of the email from campaigns, and then paste it into the new email in Automation, which isn’t quite as easy, but should help a bit. Thanks for reading, and let me know if you have any more questions!
I already have subscribers I’ve welcomed manually. If I set up an automated Welcome email, will it go out to only those who sign up after I’ve started the automation? Or will it hit everyone on the list, i.e. will it work retroactively?
Thanks. Great article!
Jeff
Hey Jeff, the rule example we show here would not send to existing subscribers, just those who join after you have started the automation.
Thanks!
Clayton
What about the scenarios where we set up an automation to email after a purchase, using the e-commerce pre-built automation. When we kickoff the automation, will it retroactively email everyone who purchased a product or only those who make a purchase after the automation goes live?
Can’t believe MailChimp hasn’t documented this, or at least documented somewhere easily indexable.
Thanks for your help,
Bryan
Hey Bryan, unfortunately I don’t have any experience with e-commerce automation. I would be very surprised if it would email all users who purchased previously (it just doesn’t sound like a great practice to have in a pre-built automation), but I can’t say for sure. Try looking for a “triggers” section to find what triggers the email to be sent, but there may not be one for the the pre-built automations.
I would recommend reaching out to MailChimp support to get clarification.
Hi …thanks for this article. I need some help with mailchimp automations. I have two different websites with one mailchimp account. So I want to create two separate welcome emails for two different tags/ segments. I’m on the free plan, so just one audience with two tags. I send monthly newsletters based on the tags and it’s working well. But I need to embed two separate signup forms on my websites. How do I do that so the subscribers from those two websites gets different welcome emails?
Sending the first welcome email is an important part of growing your email list. This article will walk you through how to set up a welcome email using our Automation feature.
Sadly, this is no longer applicable. Single-Step Automation features are no longer available for newly-created accounts. According to the documentation, “The single welcome email is a Classic Automations feature. Classic Automations are only available to accounts that have previously created a classic automation.”